
PlayFab is a back-end service from Microsoft that makes setting up things like user accounts, leaderboards, digital currencies, and other related back-end infrastructure that you would otherwise have to create yourself very easy. While it is true that rolling your own back-end solution will give you more control, you might find you spend so much time on that end of things that you are never able to work on your game. So, putting aside a need for complete control or a burning desire to reinvent the wheel, it makes sense to look at a out of the box solution that is pretty much ready to go. At a glance, PlayFab gives you access to the following:
- Player Auth/Linked Accounts
- Player Data
- Leaderboards
- In-game characters (loadouts, gear, player inventories, etc)
- Push Notifications (useful on mobile titles)
- Commerce (Inventory, Trade, etc)
- Support for management of several digital currencies
One major boon PlayFab has for it over Gamesparks (Azure vs AWS) is the fact there is a free tier that offers a lot of functionality and for testing a game should offer enough to get you ready to launch. PlayFab also works well with something like Photon Pun (a future blog topic). In-fact, the free tier has pretty much everything you need and you don’t need to upgrade until you hit 1k MAU (and by that point you should be making money…)
FlayFab also supports hosting for your own custom servers (though Unity support is… not great as far as I know) and cloud scripts (code you can call remotely to execute custom tasks). In this post we are going to cover what you need to do to get setup and running inside of Unity with a very basic user registration/login system.
ASIDE: PlayFab supports many forms of linked authentication including iOS, Google, Facebook, and several more (you have probably signed the “sign in with google” option on many websites – this is the same idea). I want to do an email/password setup so we will be using PlayFab’s LoginWithEmailAddressRequest class for our authentication.
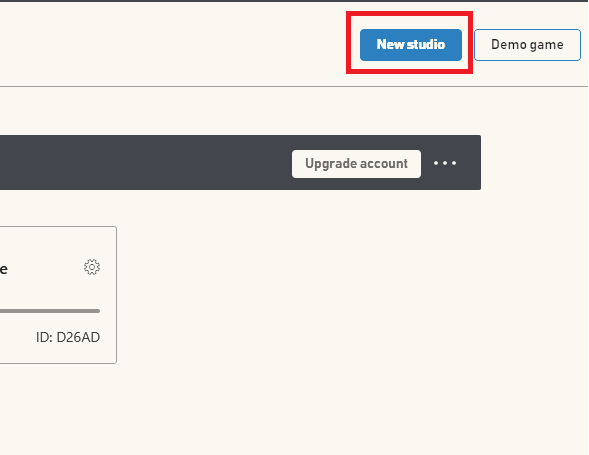
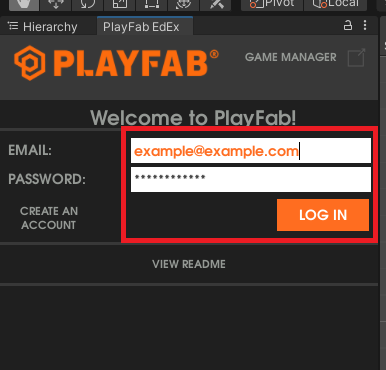
The first thing we are going to need is a PlayFab account. Head over to https://playfab.com/ (If you already have a Microsoft account you can use that to login) and sign up. Once you create an account you will be brought to a dashboard where you will want to make a New Studio to hold your games – this is basically just a folder for our purposes:
Make sure you select PlayFab for the Authentication provider. You can learn more about the SAML providers HERE but that is way out of scope for this tutorial and is probably not something you need.
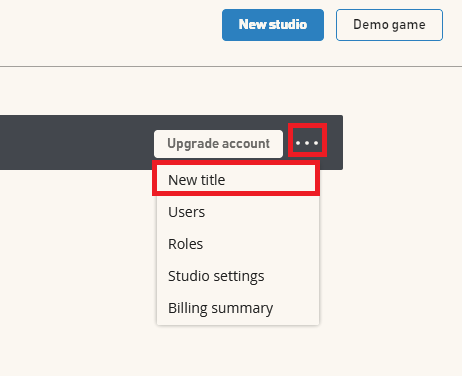
Now, create a New Title :
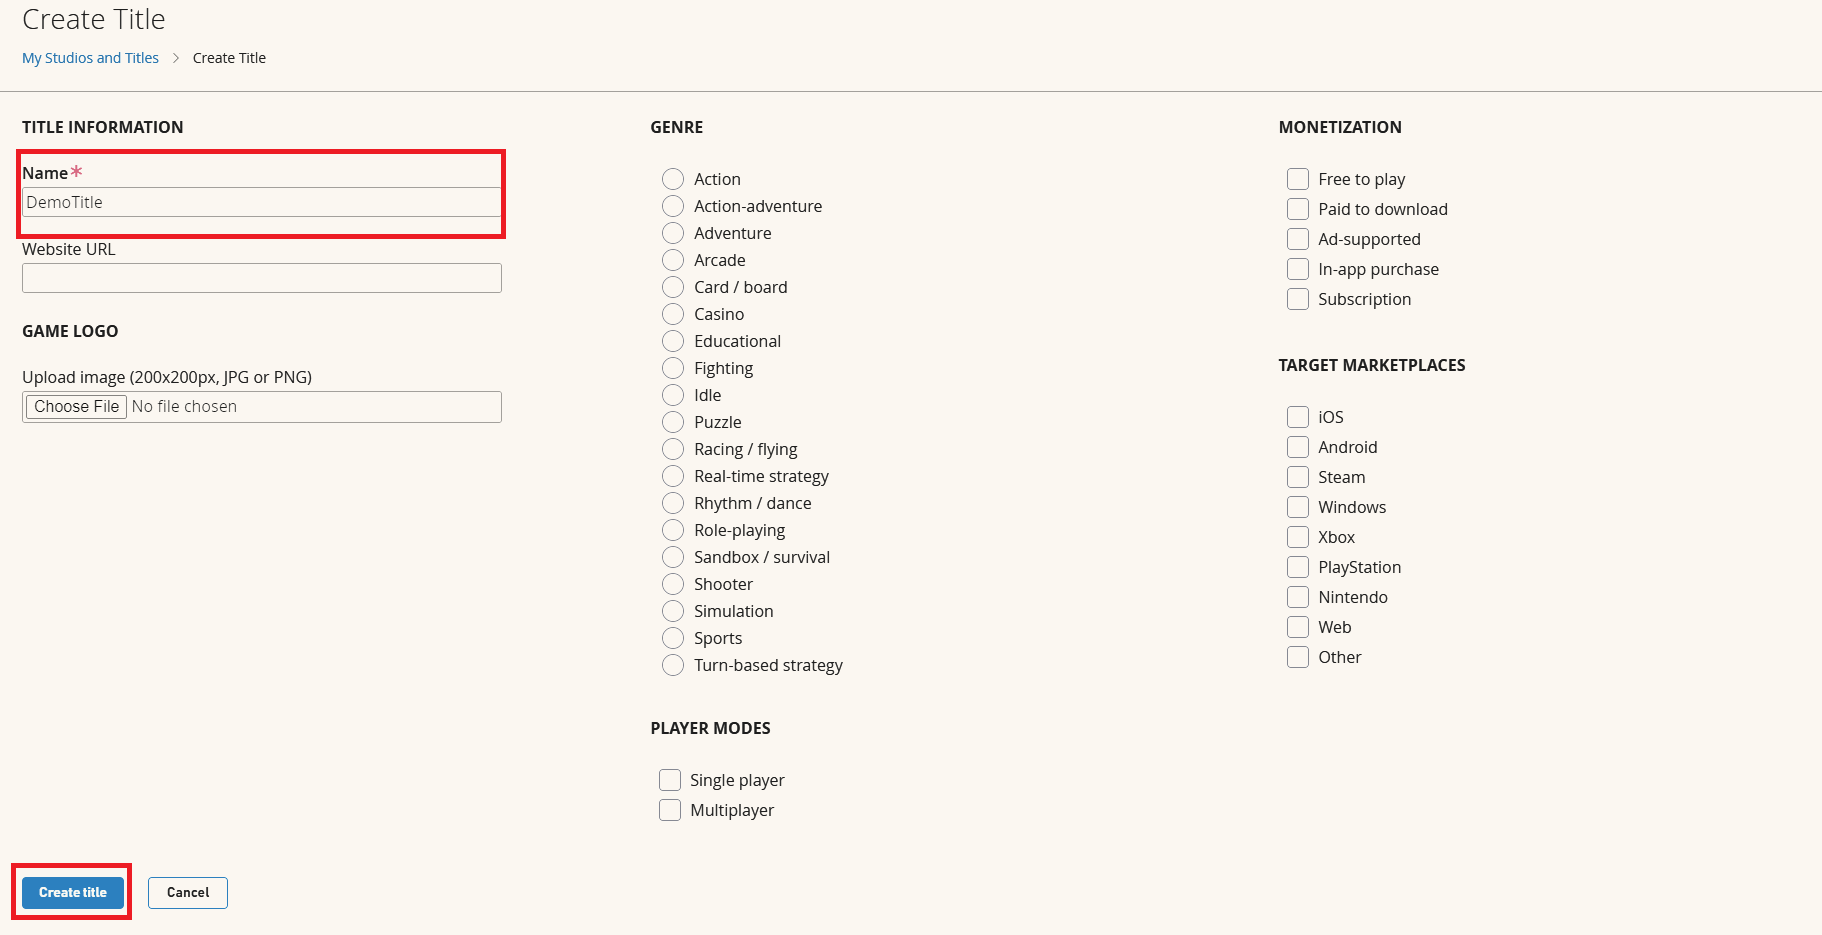
You can ignore all of the options on the right – these don’t actually do anything for us and are (as far as I know, I couldn’t find a definite answer) just for meta/title data. Fill out the Name and hit Create Title – you should now see:
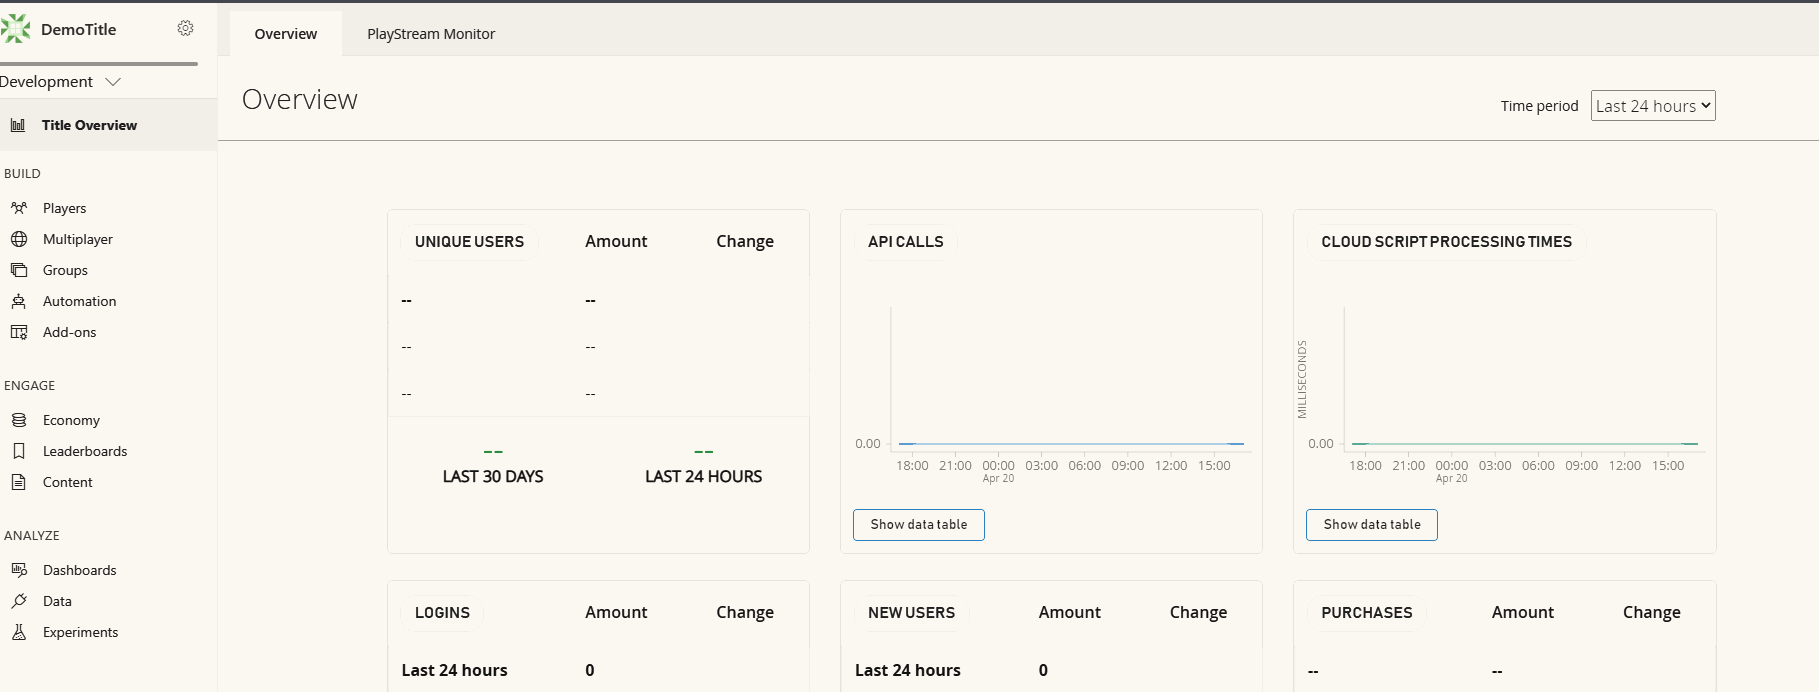
And that’s all you need on the PlayFab side of things for the moment. I have not explored PlayFab extensively as of yet but the areas you are probably going to be interested in (one the left) are Players, Economy, Leaderboard, and Content. These services cover accounts, trading/currencies, leaderboards, and things like inventories (player, npc, store, etc). Right now we only care about letting users either login or create new accounts. Before we create our Unity project we need two things: The PlayFab Unity SDK and the PlayFab Editor Extensions Package. You can find these HERE – Save these somewhere on your computer:

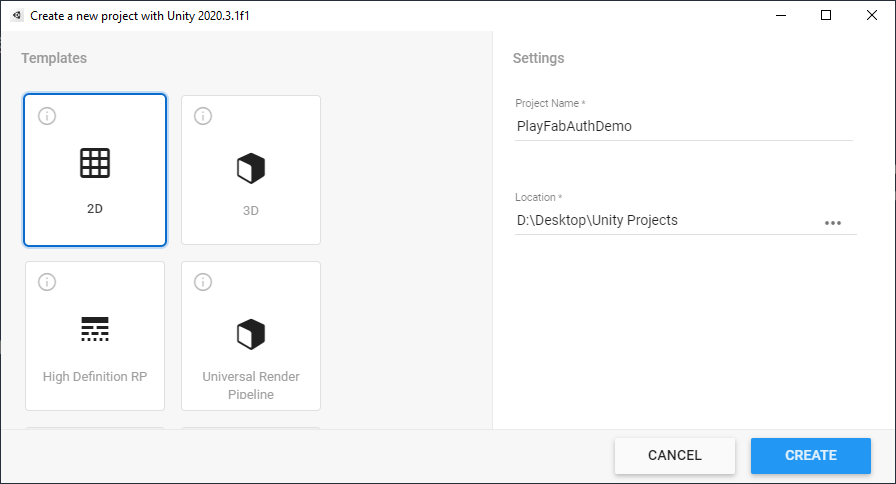
Next, open up Unity Hub and create a new project (2D is fine since this is mostly gonna be an exercise in wiring up UI):
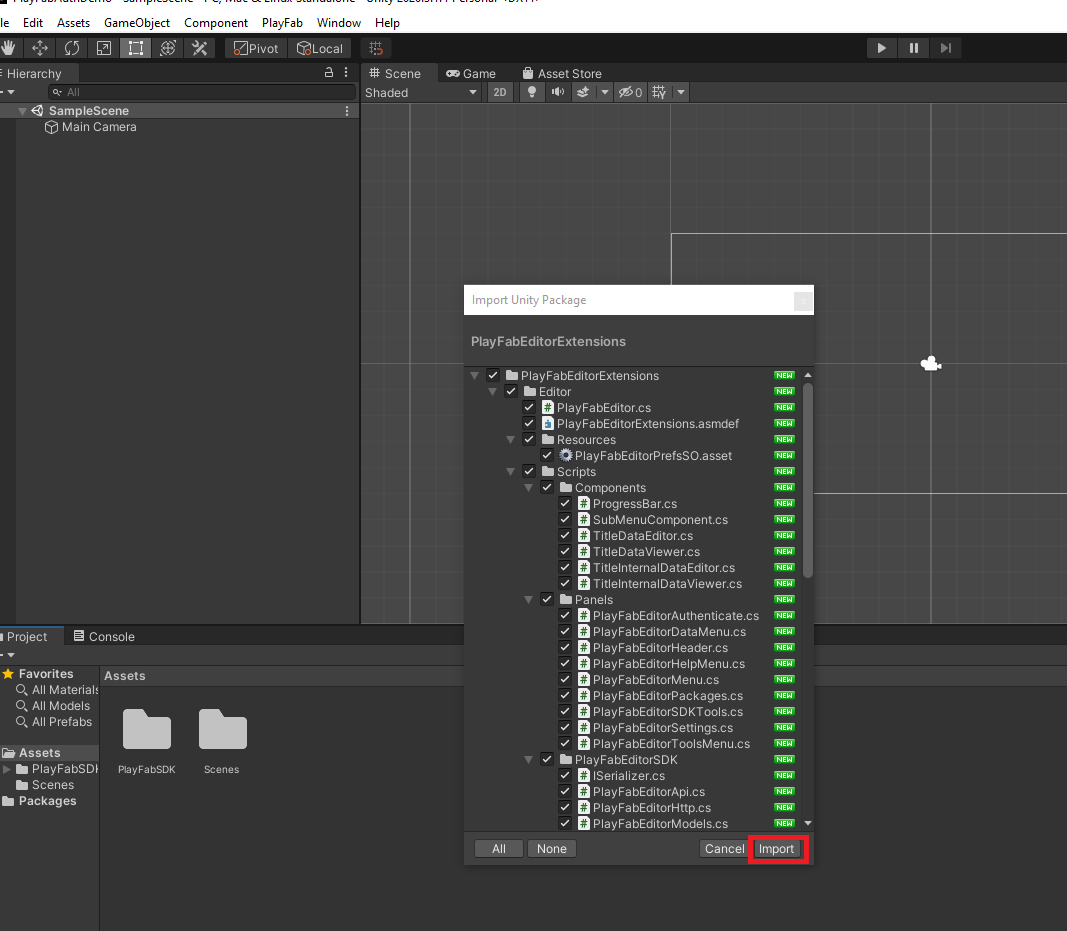
Once your project opens import the two packages you just downloaded:

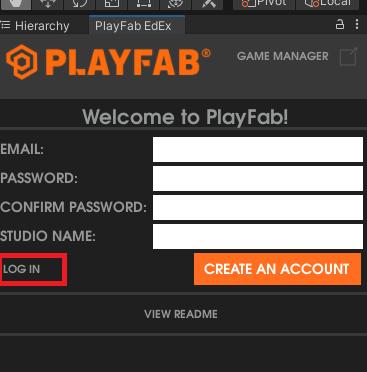
Next, under Window select PlayFab -> Editor Extensions:

The PlayFab EdEx tab should pop up (it came up next to Hierarchy on mine) – do the following steps:
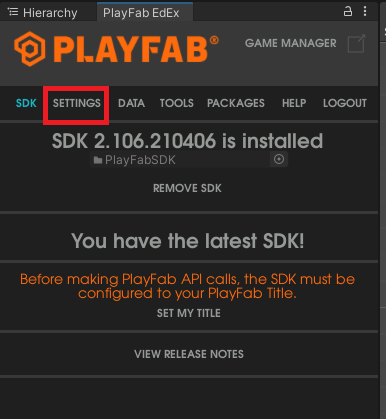
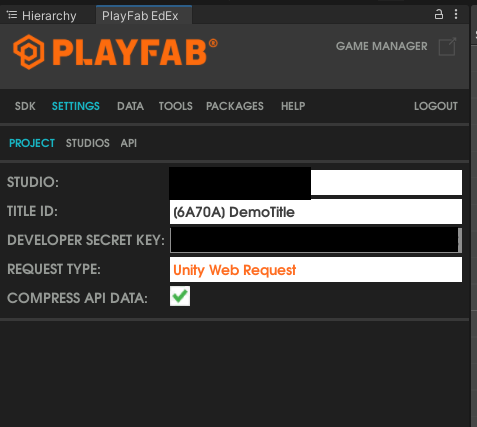
You are free to check out the other tabs, but for now I suggest leaving everything as is unless you know what you are doing. Rename the default scene to Login. In the Hierarchy create a new empty game object and rename it PlayFabLoginManager. Create and attach a script of the same name. Next, right click and create a new Canvas (UI -> Canvas) – set it as shown:
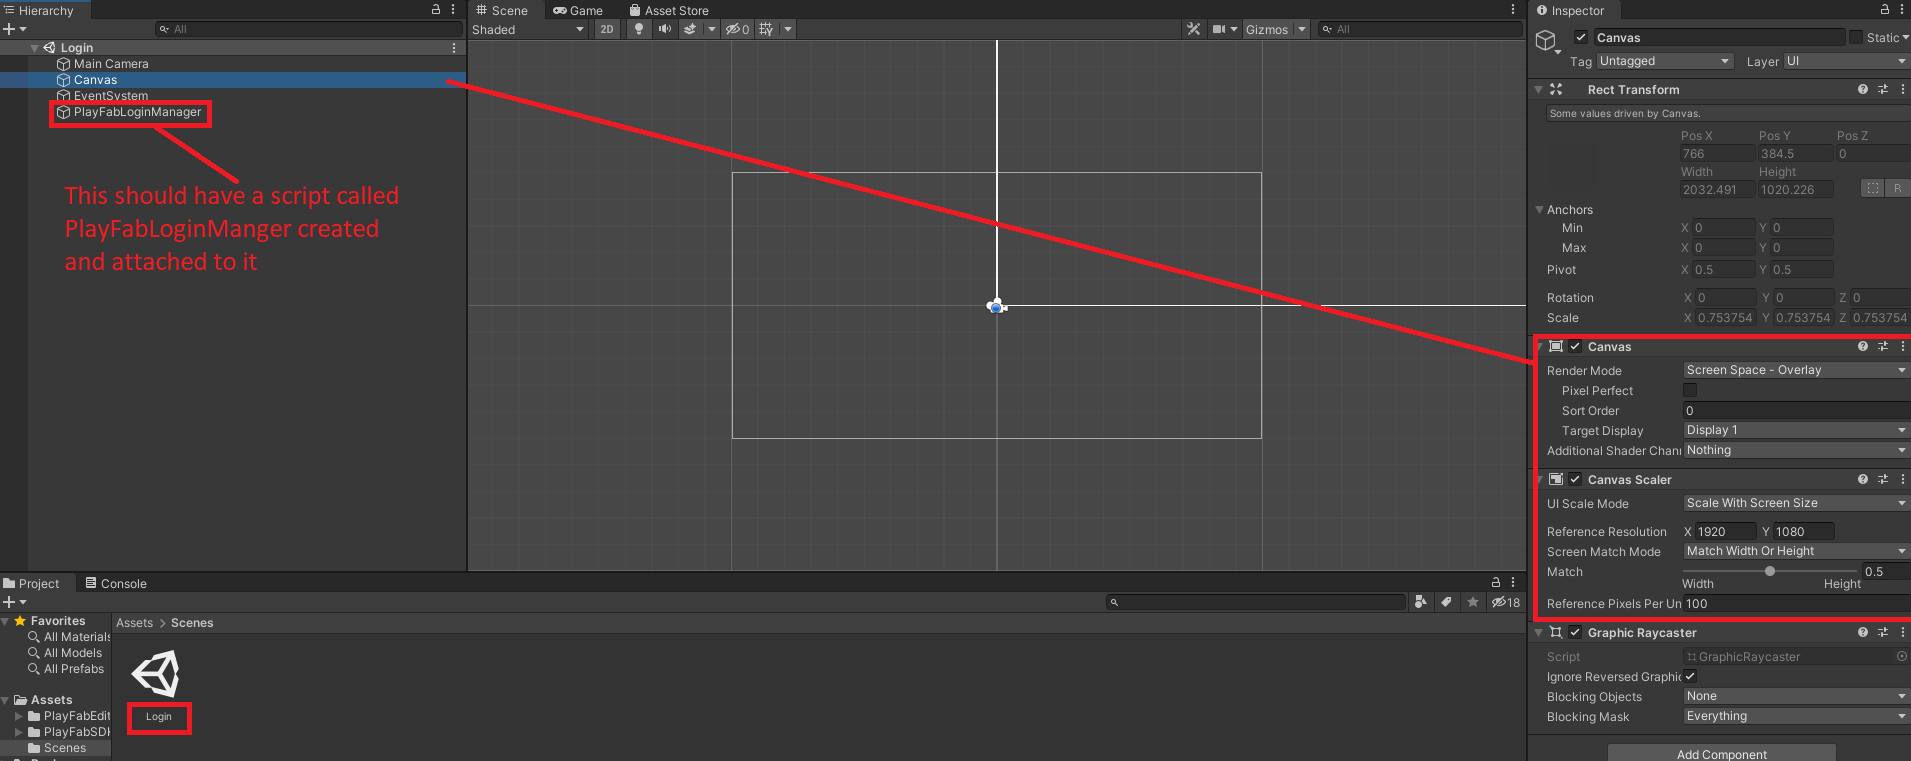
Move up a level to Assets – this project is only going to have one script but we should still follow best practice when able so create a Scripts folder and move your PlayLoginFabManager.cs script here. Next, lets build out the UI. Here is what you should have when you are done (or something like it):
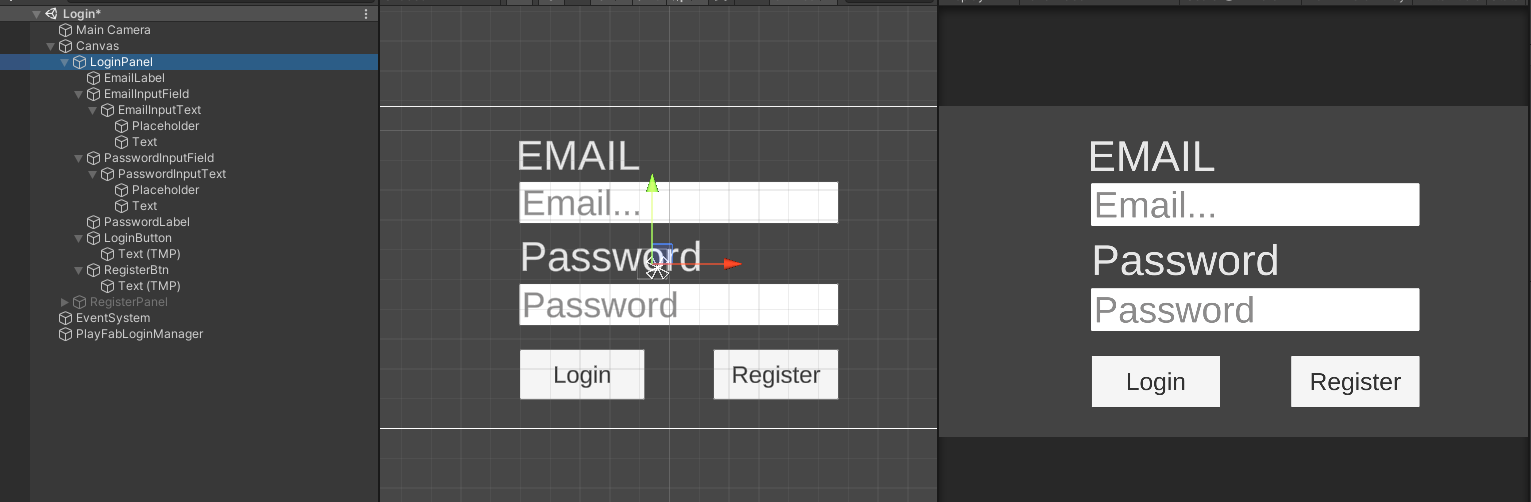
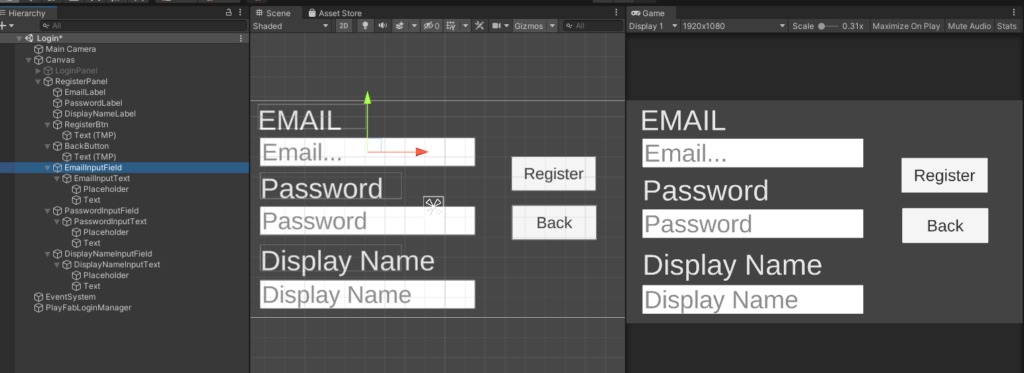
I realize I skipped over the creation of the UI itself but its really just a couple of input fields, some buttons, and some labels.
Now you should have two (hopefully prettier then these…) “forms” we can use to login and register. Set the RegisterPanel to be inactive in the hierarchy for now. The Display Name is PlayFab’s version of a nick name – this is what you would show over the players head in game (for example). Great, we are ready to start scripting!
Open up PlayFabLoginManager.cs and clear it out, adding the following using statements at the top:
using UnityEngine;
using PlayFab;
using PlayFab.ClientModels;
using TMPro;
using UnityEngine.UI;
public class PlayFabLoginManager : MonoBehaviour
{
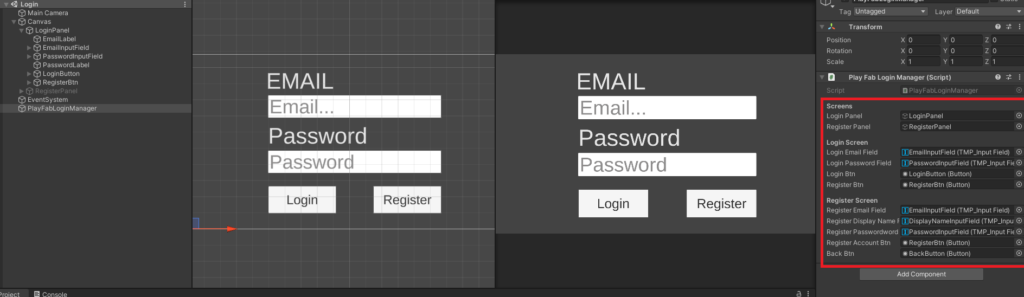
}We need references to our UI elements and panels. Lets add these and use Headers to keep things organized in the inspector:
[Header("Screens")]
public GameObject LoginPanel;
public GameObject RegisterPanel;

[Header("Login Screen")]
public TMP_InputField LoginEmailField;
public TMP_InputField LoginPasswordField;
public Button LoginBtn;
public Button RegisterBtn;

[Header("Register Screen")]
public TMP_InputField RegisterEmailField;
public TMP_InputField RegisterNickNameField;
public TMP_InputField RegisterPasswordwordField;
public Button RegisterAccountBtn;
public Button BackBtn;
Save the script. Over in the Editor, lets assign our references:
Back in our script we needs a few methods. First, lets create an OpenRegisterPanel and an OpenLoginPanel method to swap between panels:
public void OpenLoginPanel()
{
    LoginPanel.SetActive(true);
    RegisterPanel.SetActive(false);
}

public void OpenRegistrationPanel()
{
    LoginPanel.SetActive(false);
    RegisterPanel.SetActive(true);
}
ASIDE: This is an extremely simple two menu setup so we can get away with this here – if you want to learn how to build a much more flexible menu system, check out the video from Rugbug Redfern on creating a menu system for an FPS – if you are going to have several menus the approach above doesn’t scale well…
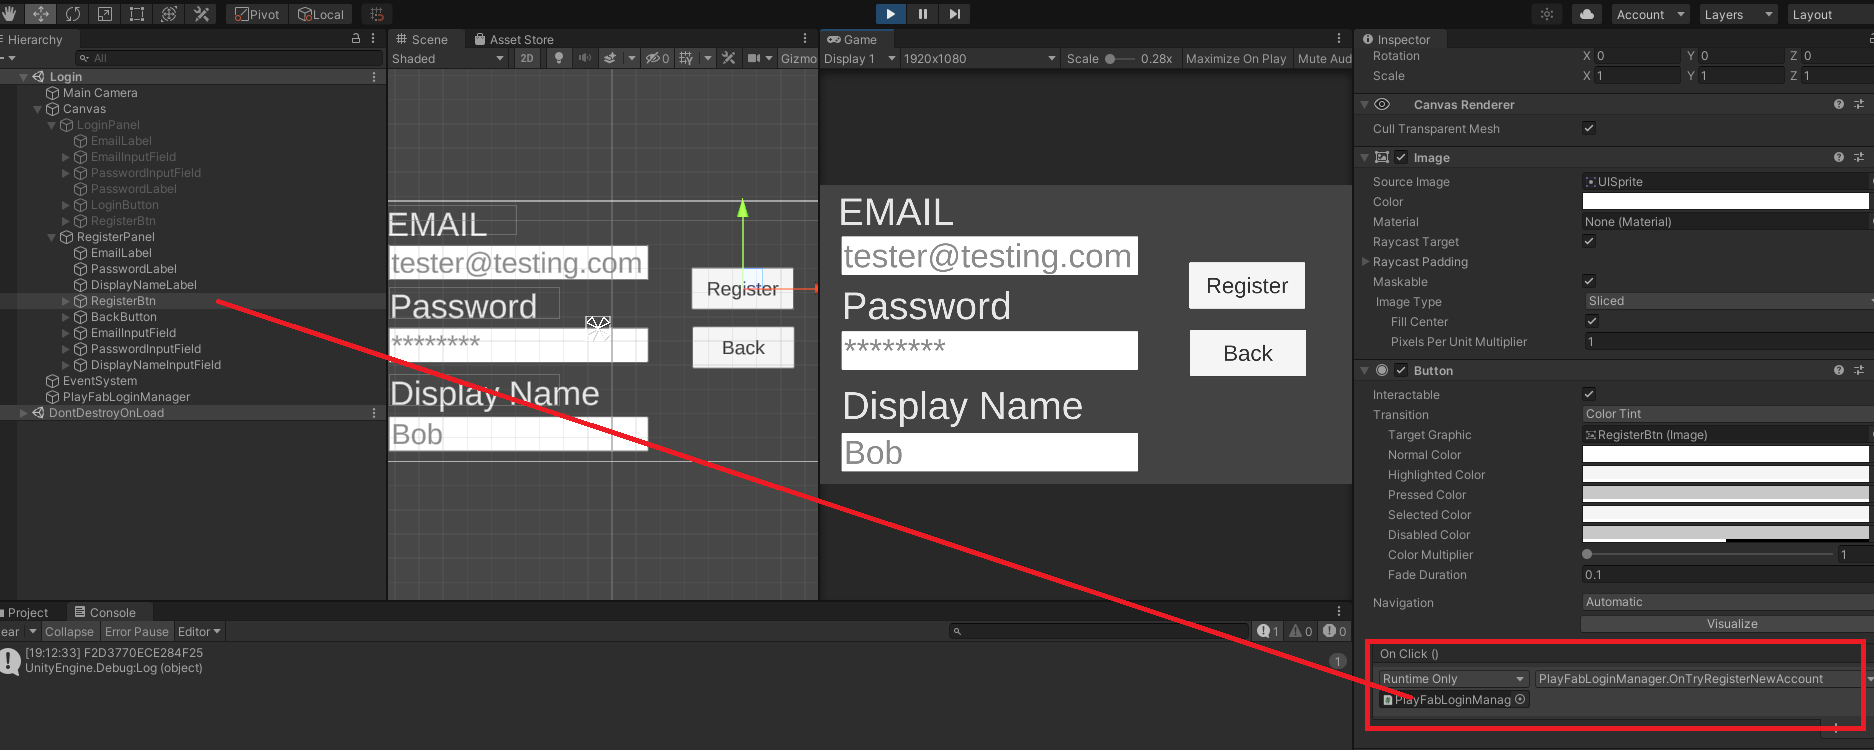
Lets wire this up. In the editor select the RegisterBtn for the LoginPanel and add an OnClick using the PlayFabLoginManager as the source and the OpenRegistrationPanel method as the target:

Under the RegisterPanel select the BackButton and do the same, only this time select OpenLoginPanel. If you did this correctly you should be able to hit play and move back and fourth between panels. Awesome, that’s all the UI stuff we need to do for now! Lets get PlayFab working. In your PlayFabLoginManager.cs script add the following:
public void OnTryLogin()
{
    string email = LoginEmailField.text;
    string password = LoginPasswordField.text;

    LoginBtn.interactable = false;

    LoginWithEmailAddressRequest req = new LoginWithEmailAddressRequest
    {
        Email = email,
        Password = password
    };

    PlayFabClientAPI.LoginWithEmailAddress(req,
    res =>
    {
        Debug.Log("Login Success");
    },
    err =>
    {
        Debug.Log("Error: " + err.ErrorMessage);
        LoginBtn.interactable = true;
    });
}
First, we create email and password strings and set them to the values in the input fields. Next, we make the LoginBtn non-interactive to prevent the player from spamming requests (not really needed here but it can provide some nice feedback). Then, we create a “LoginWithEmailAddressRequest” which is something PlayFab gives us, and inside set the Email and Password to our saved values. Finally, we make a call to the PlayFabClientAPI passing in our request, and wait for either a success or an error.
You might note that if you are typing this out you see:
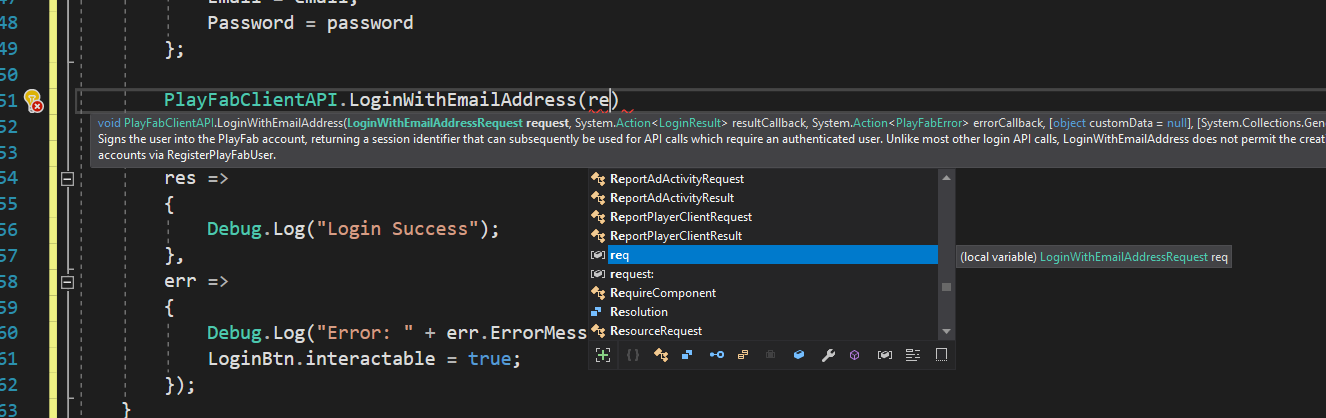
This API call expects (and requires) us to have a callback for Success and one for Error. We *could* create two separate methods to do this, but that is just going to make our code messy. Instead, we use inline lambda expressions to handle the success/error response right here. Lambda is not the focus here but if you have never seen this syntax before take a look at THIS.
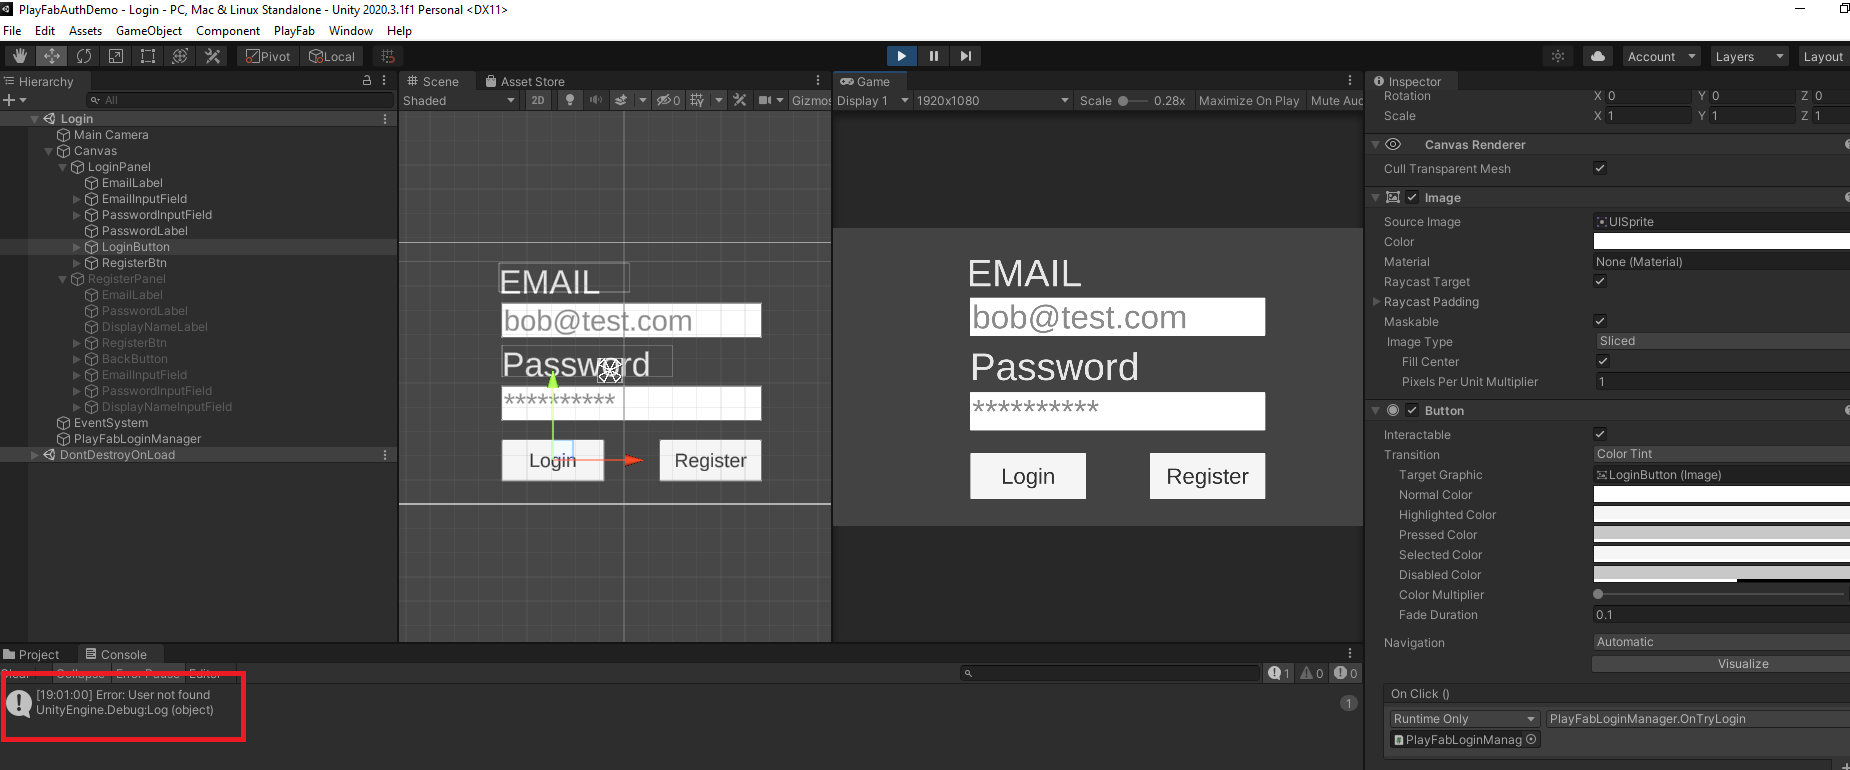
Back in your UI wire up the LoginButton to call OnTryLogin(). Of course, we currently have no users so this isn’t going to work. If you hit play and try to login you will see an error in the console:
So – lets fix this. Under OnTryLogin add a new method:
public void OnTryRegisterNewAccount()
{
    BackBtn.interactable = false;
    RegisterAccountBtn.interactable = false;

    string email = RegisterEmailField.text;
    string displayName = RegisterDisplayNameField.text;
    string password = RegisterPasswordwordField.text;

    RegisterPlayFabUserRequest req = new RegisterPlayFabUserRequest
    {
        Email = email,
        DisplayName = displayName,
        Password = password,
        RequireBothUsernameAndEmail = false
    };

    PlayFabClientAPI.RegisterPlayFabUser(req,
    res =>
    {
        BackBtn.interactable = true;
        RegisterAccountBtn.interactable = true;
        OpenLoginPanel();
        Debug.Log(res.PlayFabId);
    },
    err =>
    {
        BackBtn.interactable = true;
        RegisterAccountBtn.interactable = true;
        Debug.Log("Error: " + err.ErrorMessage);
    });
}
This is pretty close to our code for trying to login, really the only difference is we are calling RegisterPlayFabUserRequest instead of LoginWithEmailAddressRequest for our request. We set RequireBothUsernameAndEmail to false because in this example the email is serving in place of a username. By default this is set to true so we need to turn it off here. You might want to require both in your own project, but in this case, we don’t even HAVE a username to fill in.
In the Editor, wire this up to the RegisterBtn in the RegisterPanel. Hit play, and then register a new user:
When you hit Register, after a brief pause (the buttons should gray out), you will be returned to the LoginPanel. If you enter the email and password for the account you just made, you should get Login Success in the console:
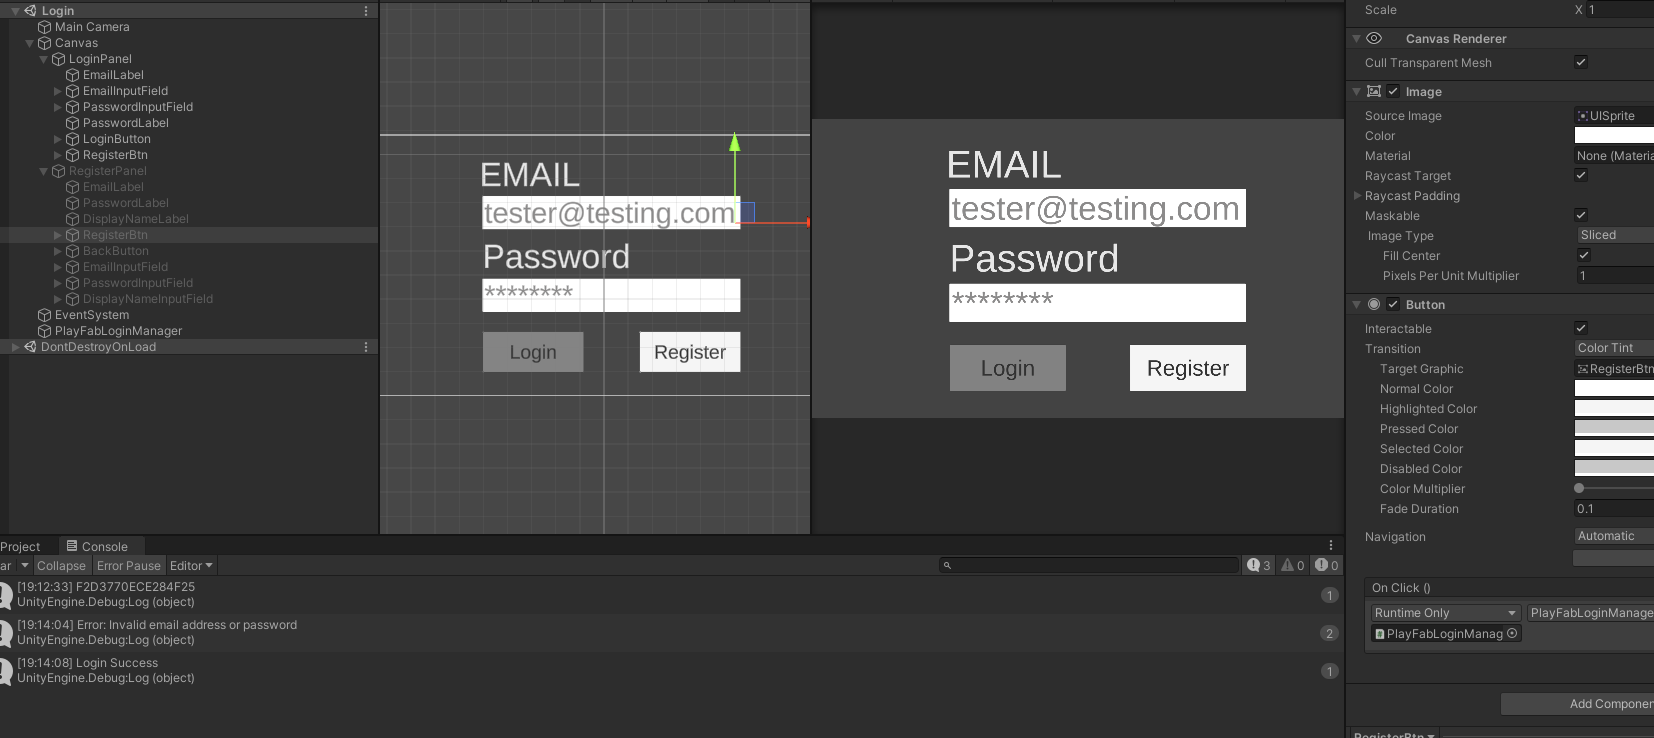
ASIDE: PlayFab requires that the password be between 6-100 characters. You can also set your own requirements by requiring and checking for things like if there is at least one number, symbol, etc when users are signing up. Also note that this code is *not* handling much in terms of checking for empty fields or even checking that the input is valid. You can add that after if you want, and in a real game you absolutely should.
Thats… it. Your done. Congratulations you now have a very basic but functional login and registration system using PlayFab as the backend. You can of course clean some things up – if you hit register again while playing you will notice the input fields are not cleared from before so that’s one thing you can do. Another would be to add some on screen status text to show your player things like “Logging In” or “Registering Account” when the player takes those actions. You could also have the game transition to the game scene when the login is a success. In the future, I plan to dive deeper into PlayFab and write about how to do more advanced things.
Here is the entire script in one piece:
PlayFabLoginManager
using UnityEngine;
using PlayFab;
using PlayFab.ClientModels;
using TMPro;
using UnityEngine.UI;

public class PlayFabLoginManager : MonoBehaviour
{
    [Header("Screens")]
    public GameObject LoginPanel;
    public GameObject RegisterPanel;

    [Header("Login Screen")]
    public TMP_InputField LoginEmailField;
    public TMP_InputField LoginPasswordField;
    public Button LoginBtn;
    public Button RegisterBtn;

    [Header("Register Screen")]
    public TMP_InputField RegisterEmailField;
    public TMP_InputField RegisterDisplayNameField;
    public TMP_InputField RegisterPasswordwordField;
    public Button RegisterAccountBtn;
    public Button BackBtn;

    public void OpenLoginPanel()
    {
        LoginPanel.SetActive(true);
        RegisterPanel.SetActive(false);
    }

    public void OpenRegistrationPanel()
    {
        LoginPanel.SetActive(false);
        RegisterPanel.SetActive(true);
    }

    public void OnTryLogin()
    {
        string email = LoginEmailField.text;
        string password = LoginPasswordField.text;

        LoginBtn.interactable = false;

        LoginWithEmailAddressRequest req = new LoginWithEmailAddressRequest
        {
            Email = email,
            Password = password
        };

        PlayFabClientAPI.LoginWithEmailAddress(req,
        res =>
        {
            Debug.Log("Login Success");
        },
        err =>
        {
            Debug.Log("Error: " + err.ErrorMessage);
            LoginBtn.interactable = true;
        });
    }

    public void OnTryRegisterNewAccount()
    {
        BackBtn.interactable = false;
        RegisterAccountBtn.interactable = false;

        string email = RegisterEmailField.text;
        string displayName = RegisterDisplayNameField.text;
        string password = RegisterPasswordwordField.text;

        RegisterPlayFabUserRequest req = new RegisterPlayFabUserRequest
        {
            Email = email,
            DisplayName = displayName,
            Password = password,
            RequireBothUsernameAndEmail = false
        };

        PlayFabClientAPI.RegisterPlayFabUser(req,
        res =>
        {
            BackBtn.interactable = true;
            RegisterAccountBtn.interactable = true;
            OpenLoginPanel();
            Debug.Log(res.PlayFabId);
        },
        err =>
        {
            BackBtn.interactable = true;
            RegisterAccountBtn.interactable = true;
            Debug.Log("Error: " + err.ErrorMessage);
        });

    }
}
hello, how ask a question for user and receive the answer? but I don’t want to put them as optional data, I want it to be required in the register, playfab + unity, register in the game with username/password/age, it would be interesting to register, ask for full name too
https://community.playfab.com/questions/55882/how-ask-a-question-for-user-and-receive-the-answer.html
Hi Giovani,
PlayFab supports a variety of fields when registering a new user – see the docs at https://docs.microsoft.com/en-us/rest/api/playfab/client/authentication/register-playfab-user?view=playfab-rest – if you need additional settings/infomration saved, you could first register the user and when you get that response, set custom data for that player as a second request with the custom fields you added. Look at something like https://docs.microsoft.com/en-us/rest/api/playfab/admin/player-data-management/update-user-internal-data?view=playfab-rest to see how to do that. I don’t believe there is a way to add custom data to the initial registration request though :\
To make those fields required you could simply not allow the game to submit the form without those fields being filled in with valid values (although you need to create the validation yourself).