
Introduction/Preamble
The goal of this post is to show you how to setup and secure a new AWS account, create an admin user that will in turn be used to create child accounts that you can easily create/destroy on a *per project* basis – link in consolidated billing, billing alarms, and tie it all together by setting up AWS Identity Center (Previously known as SSO) so you can create a user that is able to easily jump between accounts while maintaining short term credentials and preventing the need to role switch.
This is far from the only way to set things up, and other techniques like role switching (where you assume a role in account B from account A without actually logging into account B) have their place, but I personally find it very cumbersome to do that.
Alt. you could use something like Control Tower to automate account setup, but for personal/project accounts that can be overkill and come with costs you may not expect (or want).
This tutorial is going to be a bit long and take a few detours, because I not only want to show you how to set this up, but also other auxiliary bits of information to be aware of. I will assume you have never set up an account before – so I am going to walk you through it, step by step. I will be using a fresh account for this guide so everything I am showing should line up with what you see.
Terms and Concepts
- Management Account – This will be the first account we create. This account will be where your billing for all your child accounts appear. This is the *payer* account, and will need to have a credit card tied to it (don’t worry, if you stay in free tier you won’t get billed, but AWS requires you to have one on file)
- Root user – This is the user that gets created when we first setup the Management Account. We will secure this user and then never touch it again.
- IAM Admin User – This user will be a full admin in our Management Account, and primarily be what we use to setup the AWS Organization and SSO structure.
- Organization – This is created as a way to structure and organize child accounts and is what makes our core account the Management Account
- Organizational Unit (OU) – This is kind of like a folder for accounts – this is useful for several reasons which I will talk about later
- SSO/Identity Center – This is what we will use to create a special user that we can assign different levels of access (well, admin in our case) to accounts we create to allow an easy way to log in to any given account in your org.
- SSO Admin User – The admin user we will create and give the ability to easily swap between our accounts/projects
- MFA – Multifactor Authentication, aka 2FA
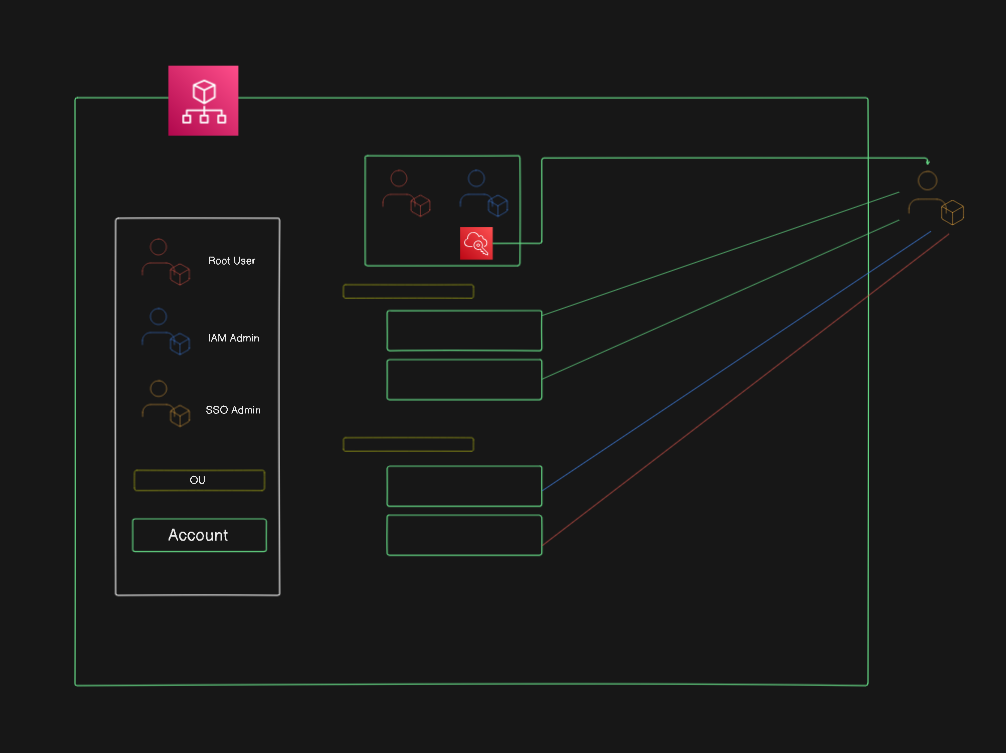
Below is some amazing programmer art to illustrate what we will be creating – exciting I know.
Step 1 – Create the Management Account
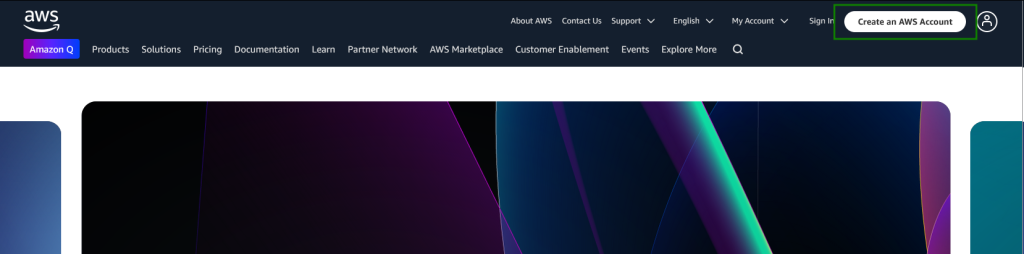
First things first, we need an account to get all of this started. Head over to AWS and click on Create an AWS Account (located in the top left of the screen):
Enter your primary email and name the account
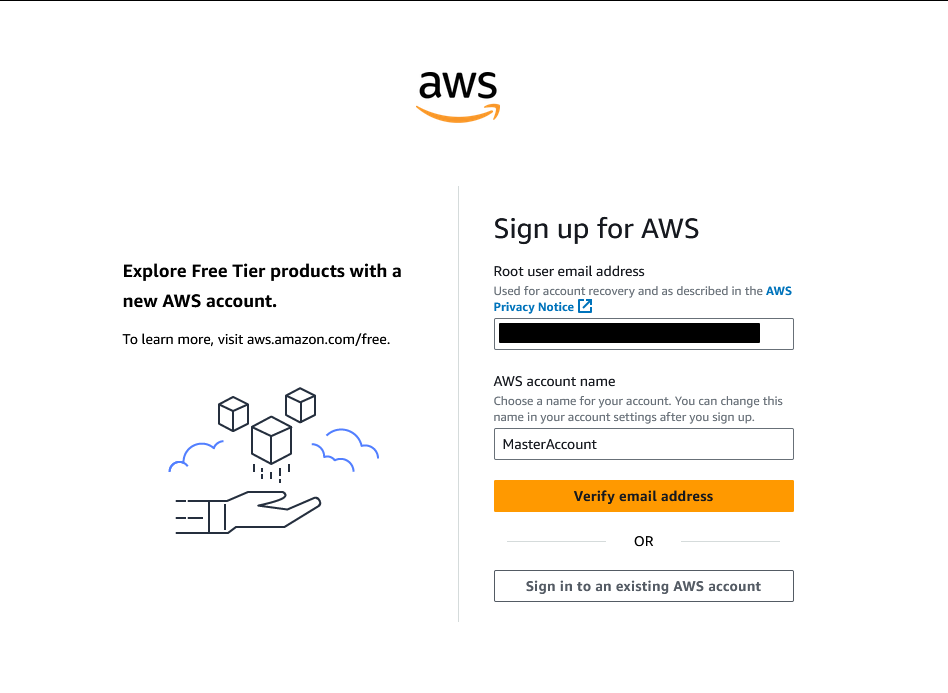
If you have already used an email to create an account in the past, you cannot use it again.
However, AWS allows you to do the following: If your email is [email protected] you can user [email protected] – this will, for many providers (allegedly, I can only vouch for gmail) still send it to your primary email while letting you effectively create unlimited accounts all tied to that address.
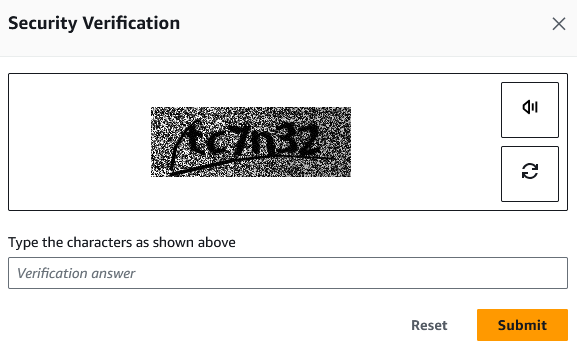
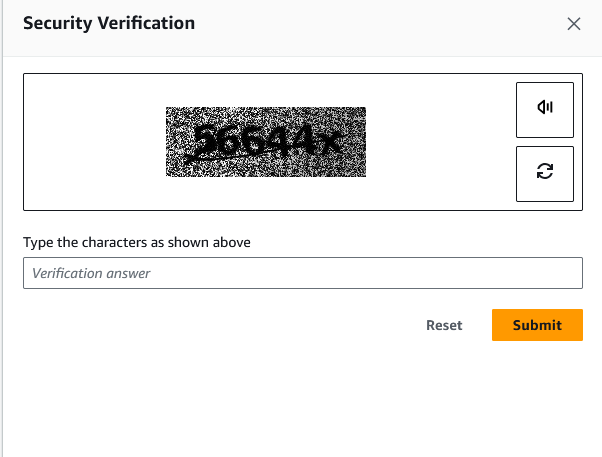
Click “Verify Email” and fill out the security verification Captcha
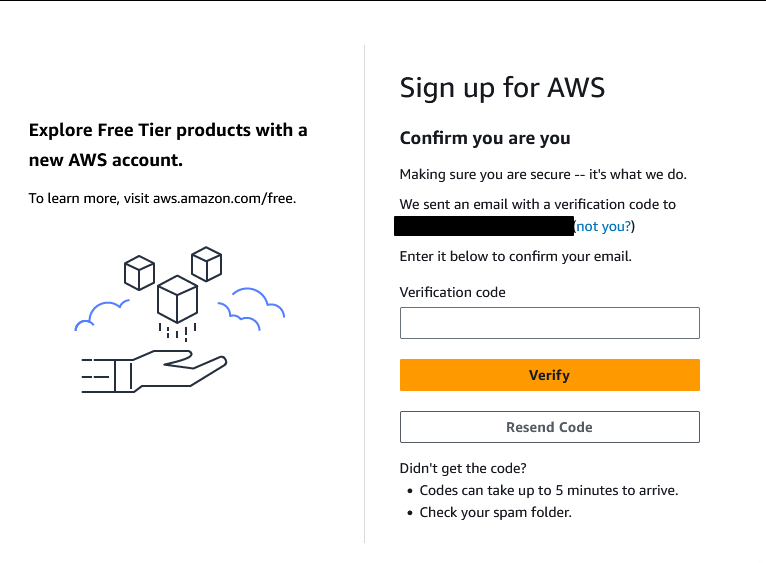
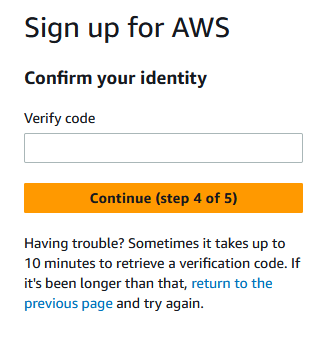
Enter the verification code sent to your email
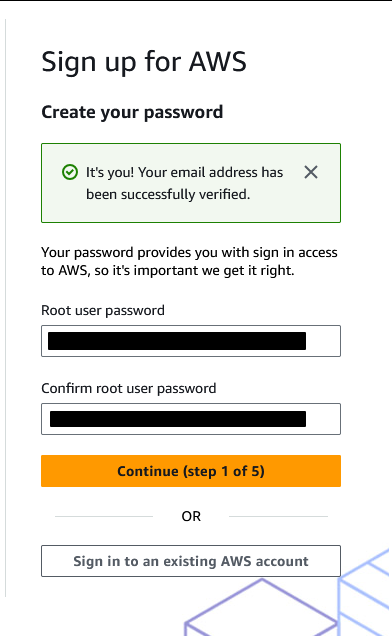
After entering the code you get – you will be prompted to create a Root user password. I recommend you use a password generator/manager like bitwarden or such (I have no preference so pick whatever makes sense to you) and make it complicated. Repeat after me: secure this user like your account depends on it
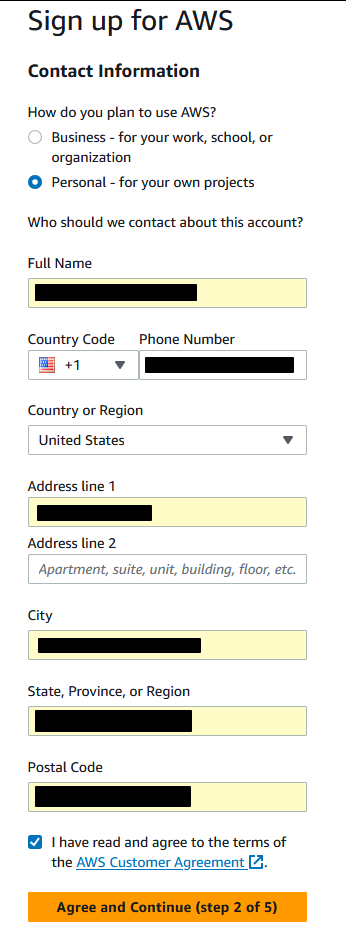
Next you will need to fill out some contact information
You will then need to enter a credit card to continue – again, as long as you stay in free tier limits, you will not be charged – although a $1 temporary hold may be placed on your card while it is verified.

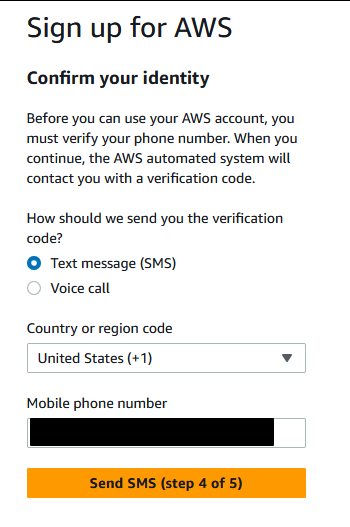
Enter your phone number to confirm your identity:
Complete ANOTHER security check
Verify with the code they sent to your phone:
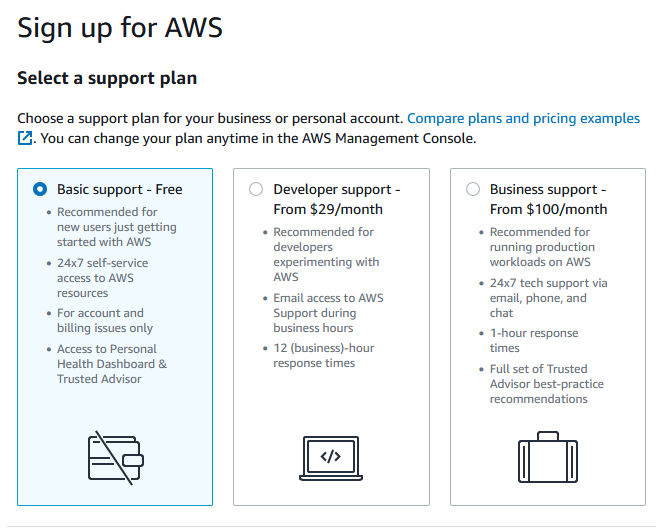
Lastly, and this is important, choose a support plan. I highly suggest that unless you know why you are choosing otherwise that you stick with Basic support
If everything went well, you should see:
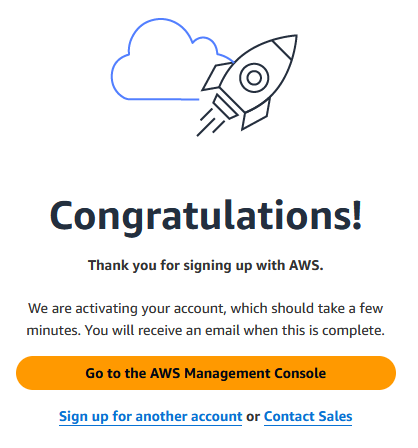
Click “Go to the AWS Management Console” – you will get a few “tutorial popups” you can close (or read). The good news is, you only have to go through all of that tedium once during this initial setup.
Step 2 – Secure the Root user
When you first create this account and continue to the console, you will be greeted with a screen that looks like the following:
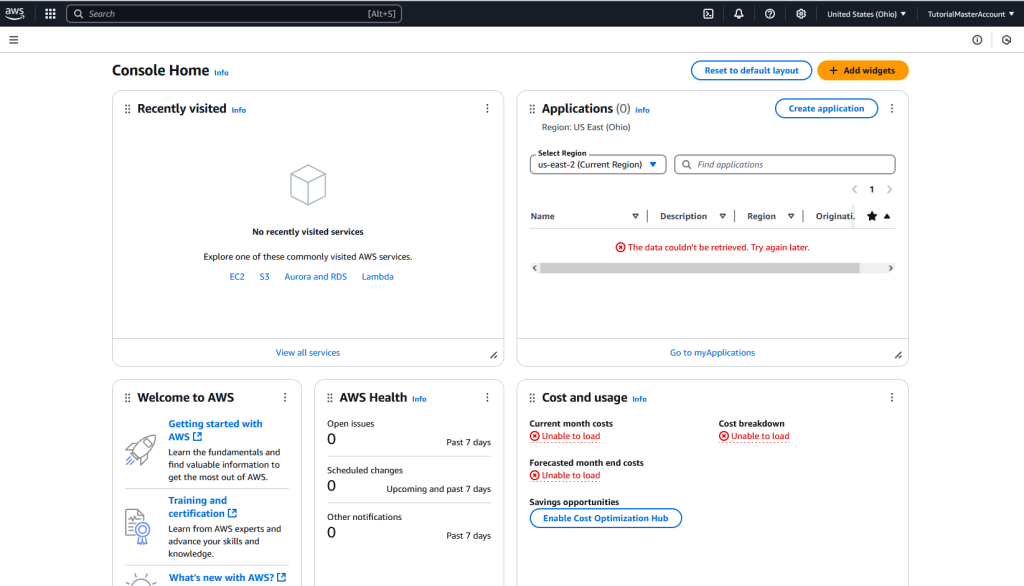
If you click on the three dots next to any section, you can remove that widget. I recommend keeping this landing page as tidy as possible – if you accidentally remove something you wanted, you can always reset to the default layout or add the widgets back) using the buttons at the top.
For whatever reason, my default region was set to Ohio (us-east-2) – you can leave it there or (and I recommend this) move it over to us-east-1 (N. Virginia). Remember, Regions contain availability zones, and most services are launched into those availability zones. If you create resources in Region A, chances are you won’t see them show up if you switch to Region B (though some AWS services are global).
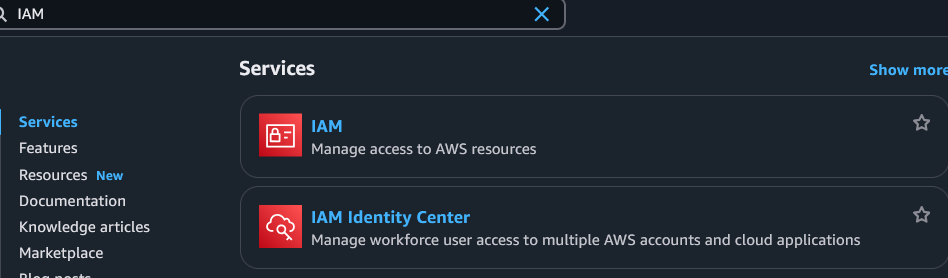
Click on the Search bar at the top and type “IAM”
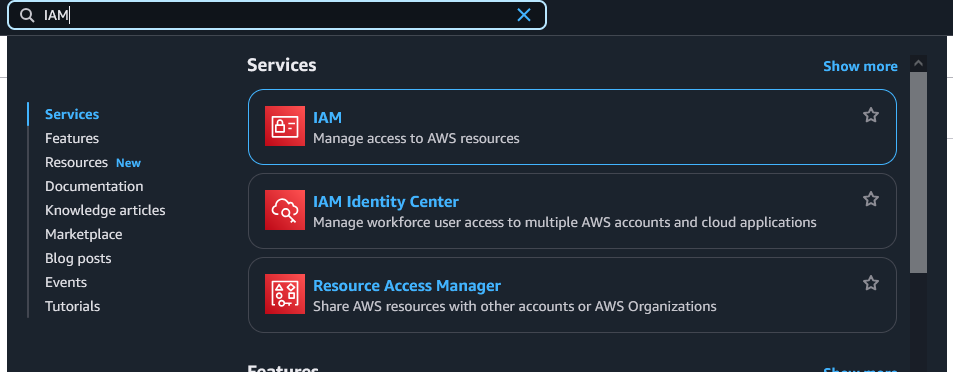
When you first land on the IAM Dashboard, you will see the following
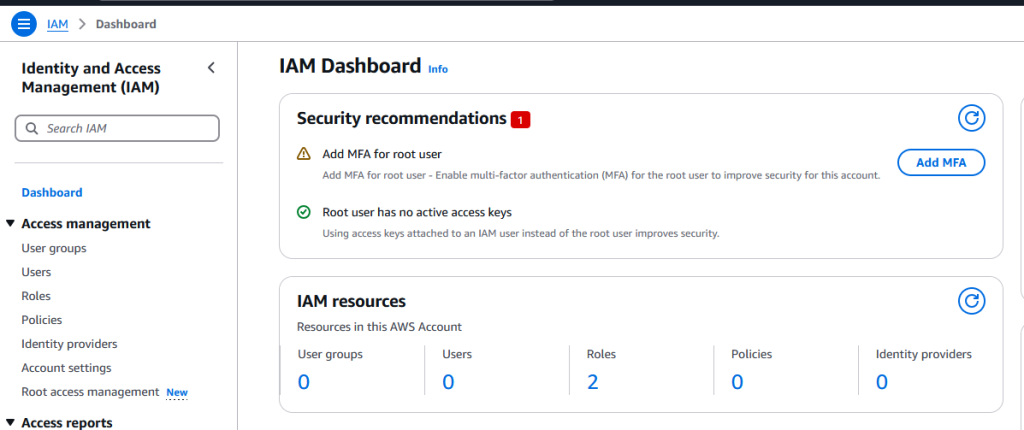
You see that big, bold, security recommendation with the red 1 and the “Add MFA” button? Click that. Do that before you do *anything else*.
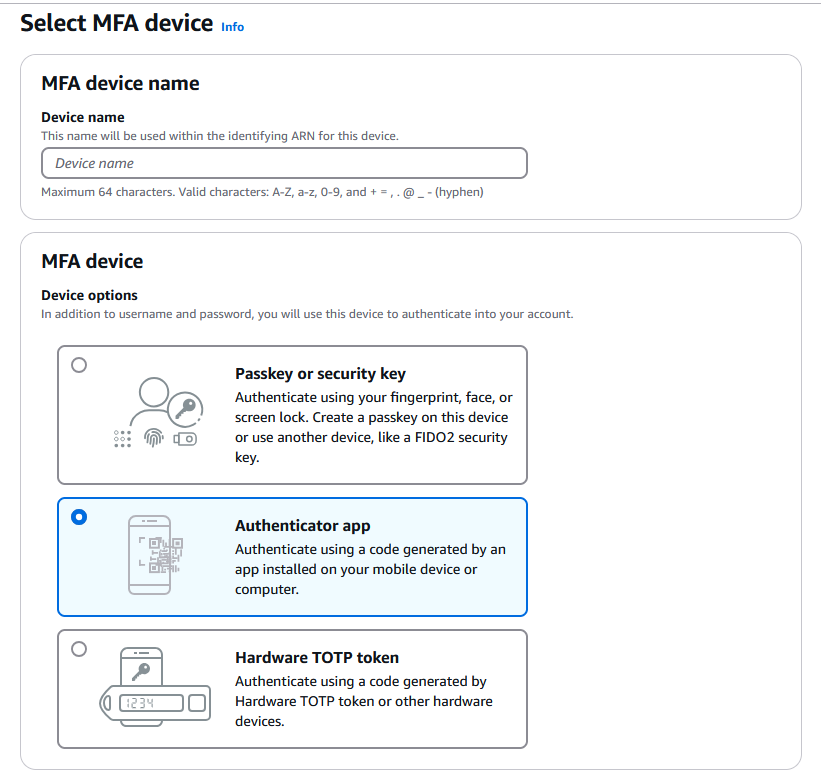
Choose the Authenticator App option (it is highly unlikely you will want to use either of the others unless you know why you would want them) – You will need an Authenticator app – I personally use Google Authenticator but there are others. The “Device Name” field is a little confusing – you are not actually going to put the name of your device, but rather something like “AWSMasterAccount” – when your app scans the QR code, it will format the entry as “Amazon Web Services: [Device Name]”. Pick something useful here or when you end up juggling a dozen or more MFA codes it will get confusing.
You will then need to click “Show QR Code” and enter two consecutive codes:
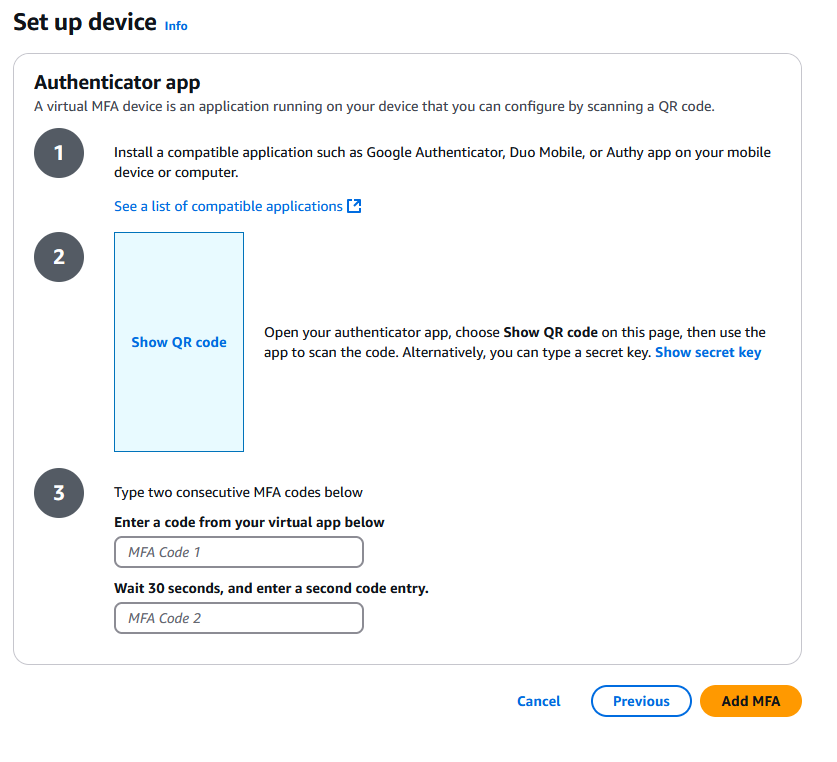
What all this does is add a very necessary layer of security to your root user. When you next log in, you will need the username (email) and password, but ALSO the MFA code generated by the app. This stops bad actors who guessed your password from being able to access your account without also having access to your 2FA device (most commonly your phone). You should do this *100%* without fail.
After you hit Add MFA, you will land on a page with some stuff you can ignore for now like the Access keys etc.
Step 3 – Create the IAM Admin User
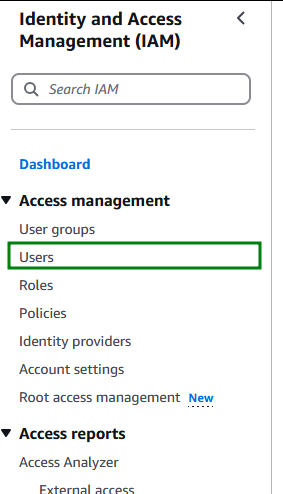
After you secure the Root user, go over to the Access management menu in the IAM console

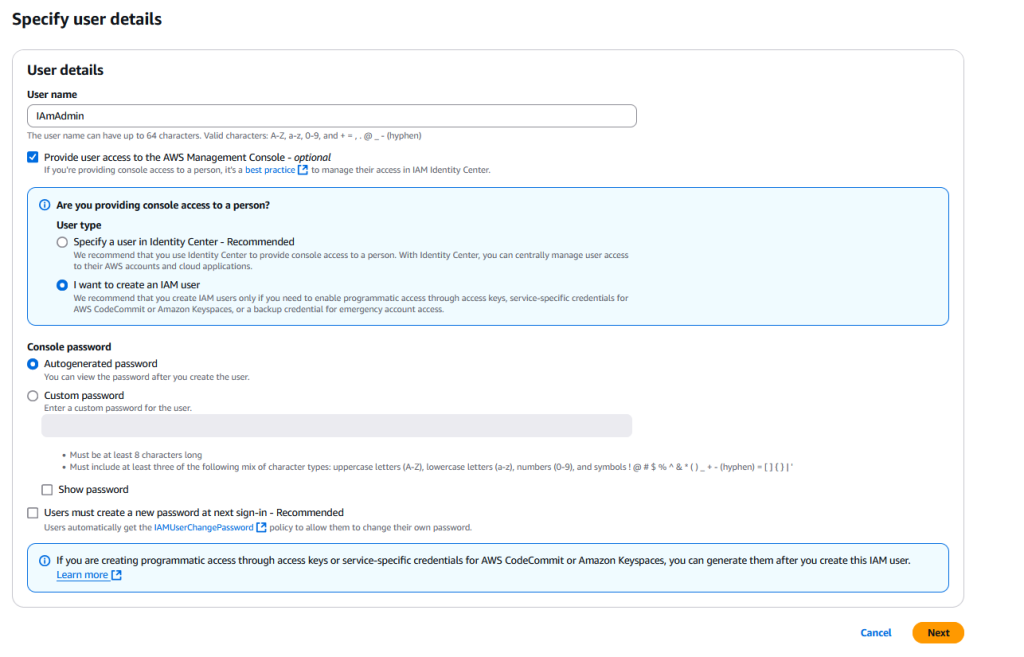
Give your user a name – IAmAdmin is a common convention (or at least it’s what I was taught, so I use it) – check the “Provide user access to the AWS Management Console”, then check “I want to create an IAM user”. You can use the Autogenerated password or pick one yourself – though if you do make sure it is as secure as your root user’s password. For this tutorial I am unchecking “Users must create a new password at next sign-in” box. Since this is an admin user that you will use in your account it’s a little redundant to have to set the password twice. Click “Next”.
Aside: You may be wondering why we are creating a separate user in the account we intend to give full admin access to – and that’s a good question. The reason is as follows:
In AWS, the root user has complete, unrestricted access to all resources in an AWS account, including account management tasks like closing the account or changing billing information. An IAM user with AdministratorAccess can perform most administrative tasks but cannot manage the account itself
With a single exception I will cover later, there is nothing you will need to do that the IAmAdmin user won’t be able to accomplish – and we will be giving special permission since this account is for your own personal use so that the IAmAdmin user *can* do that thing (it involves seeing billing/costs)
After you hit next, you will need to give this user permissions. By default, any user created inside AWS has *zero* permissions. Set it up as shown here:
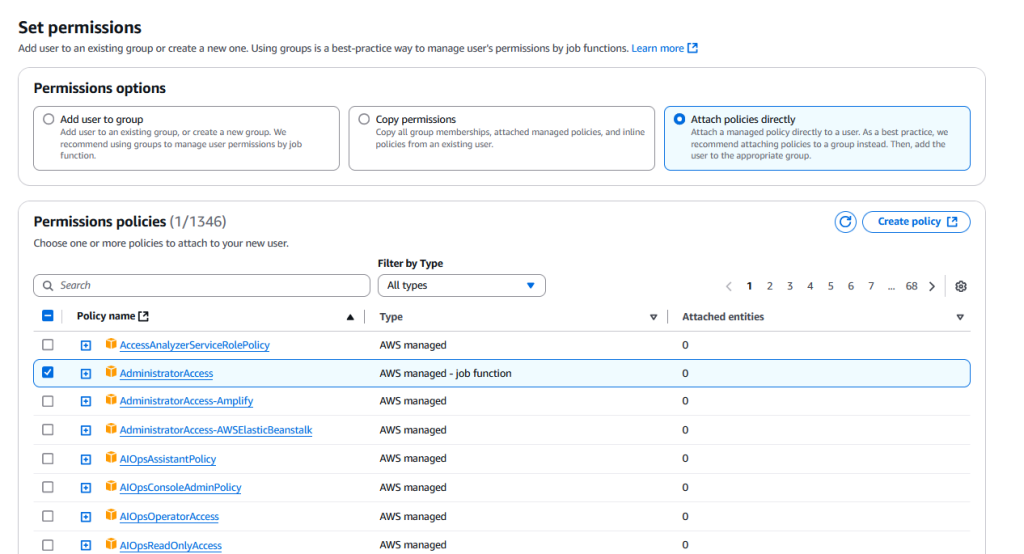
If you click the little “+” next to the name of the policy, you can see what it is actually giving this user
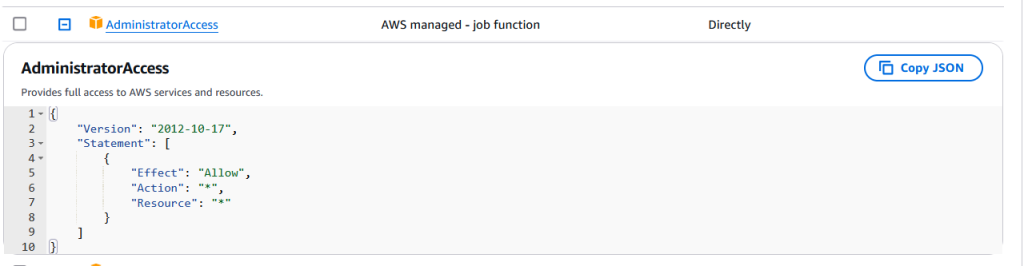
This does exactly what it says – whatever user this policy is attached is allowed to take any action on any resource.
Aside – Because this is the only IAM user we will have aside from Root, there is no need to set up groups – that is for managing… well, groups of users.
Scroll down and click “next” again.
Review the setup and make sure it looks like this (mainly that the AdministratorAccess permission is attached)
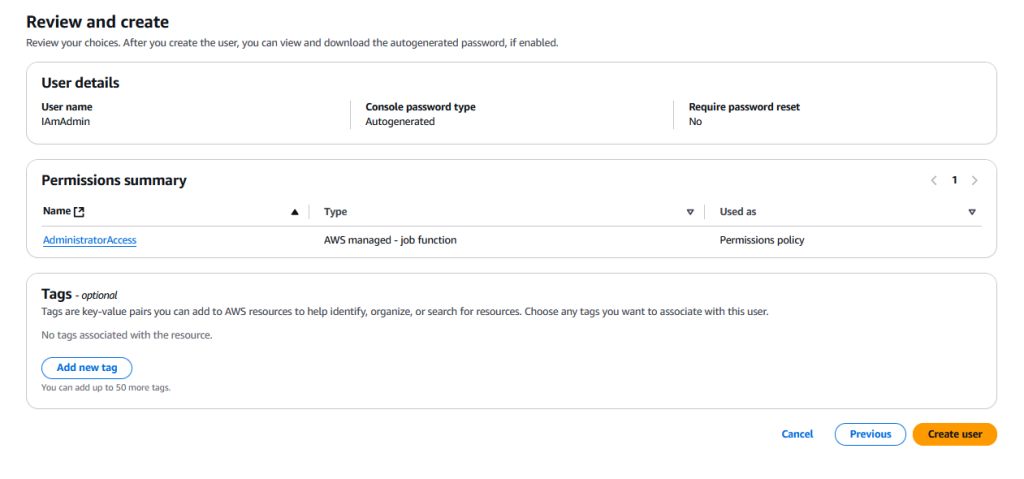
Hit “Create user”
If you opted to have the password be generated by AWS, you can see/download it here. Copy down the sign-in URL somewhere safe as well. Once you do that, you can return the the users list and you should see your new user

Great – now we can sign out of Root. You never want to log in as this user unless you want to delete your account, update your primary billing info – or other top level account actions. Use the IAmAdmin user going forward. Before we do that, I just want to mention a few details that I think are important to know. If you click on your user, you will get a page detailing information about said user:
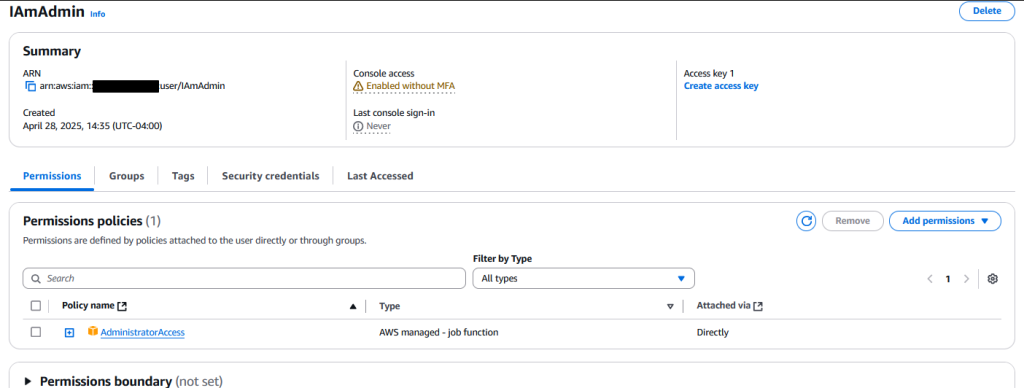
See that little “Enabled without MFA” warning? Fix that. Click that link and set MFA up for this user as well. Do it. Do it now.
Second, do you see that “Access key 1” and “Create access key” in the top right? I want to talk about this for a second because it is a super important thing to understand. Usernames/Emails/Passwords etc are used to *log in* to the AWS Console – the thing we have been interacting with since we created our account. Access Keys are a little different, they are used to *programmatically* access services and resources in a given AWS account via the AWS CLI tool. That is… very much outside the scope of this post but you really should read up on what that is and the implications of setting access credentials for a user. Our SSO user will actually get access credentials, but the difference is those are short lived and automatically rotate/time out. If you set them here, they are considered “long lived” and if they leak, it can be a lot more damaging.
Step 3.5 – Enable your IAmAdmin user to be able see and manage costs across accounts
While you will be using the upcoming SSO user for your day to day, the IAmAdmin user will still be used from time to time.
One thing you will use it for is to provision OUs/Accounts and actually manage your organizations structure. The other thing you will want to be able to do is view costs across your various accounts/projects.
By default, only the Root user can access the Billing and Cost Management console – but since this is meant to be a personal setup for projects, and we don’t want to log in as Root, we need to enable this for IAmAdmin. We want to do this as well because the Management Account (the one we are in) will have all of the various costs from other child accounts bubble up. This is known as consolidated billing, and it means that you can manage all of your billing/costs in a central location instead of needing to manage it on a per account basis. However, this is actually a little tricky to find if you don’t know where to look.
Small note – if you have another user that is setup just to manage billing (more common in a company/business setting), you would need to attach the Billing permission. Because our IAmAdmin user is a full admin, we simply need to enable IAM access to Billing
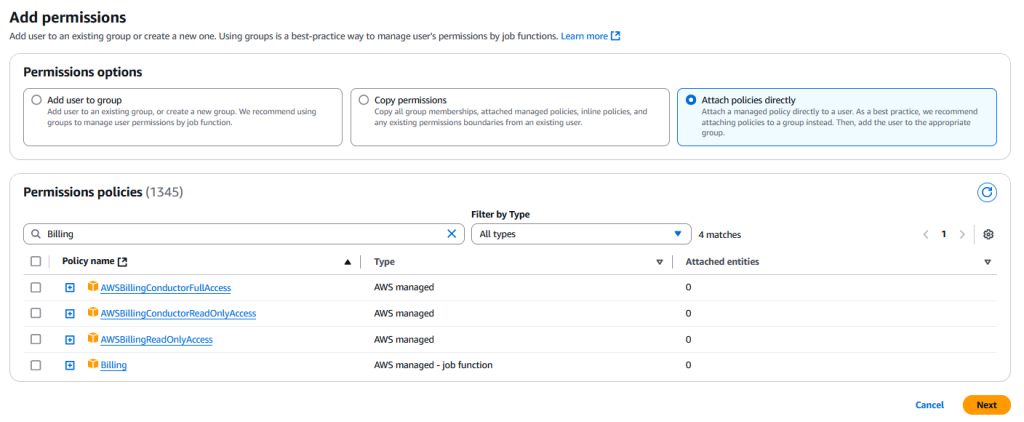
If you go back to the IAmAdmin user overview, and click “Add Permission” under Permission policies
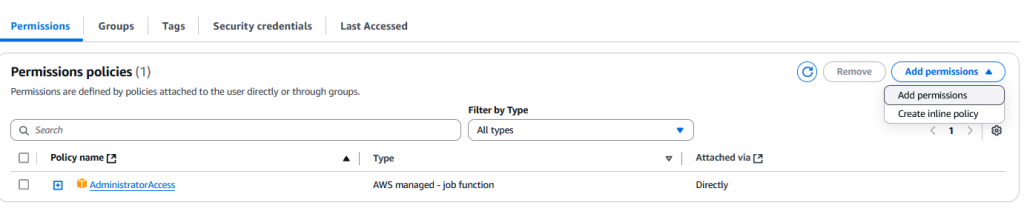
Select “Attach policies directly” and search for “Billing” – you should see
If you hit the little “+” icon next to the policy called “Billing” – you can see the policy itself. I am planning on doing a much deeper dive into IAM and account management in the future but for now, take note of the description of this policy
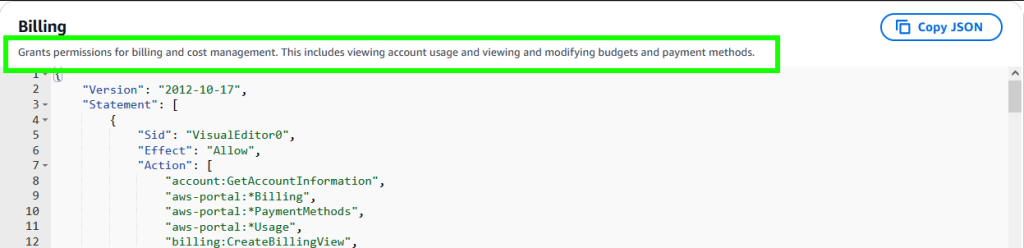
Like I said, if you added this policy to your IAmAdmin, it wouldn’t do anything, because you are already a full admin. But, if you created a IAmBilling or such for just this purpose, and then attempt to access the billing and cost management console, it won’t work without both adding this policy AND enabling something else first.
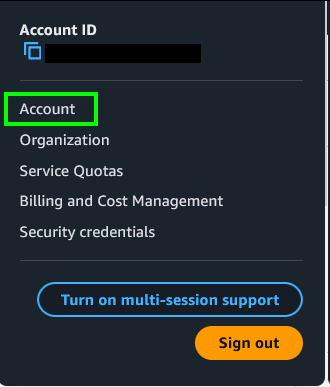
What we need to do is head over to our actual account settings (as the Root user) up in the top right of the console
Once you are on your Account page, scroll down until you see

Hit Edit, check the box next to “Activate IAM Access”, and hit “Update”

Great, now our IAmAdmin user can access Billing and Cost Management.
Head over to Billing and Cost Management by searching for it at the top of the page and click “Account”
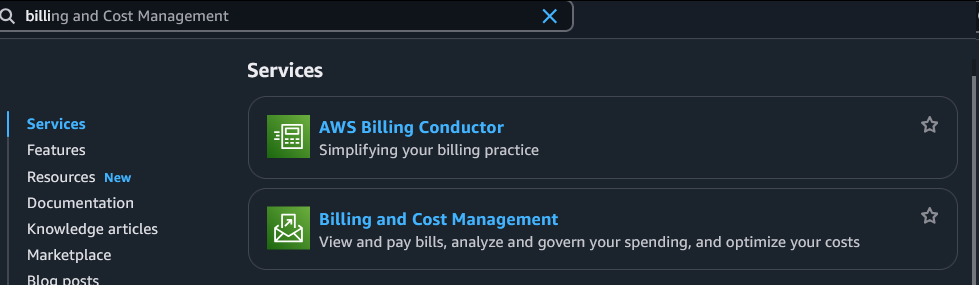
Quick Tip – if you click the star next to a service, it will “favorite” it for you and add it as a shortcut to your console – this is a great way to customize your console for quick access to commonly used services
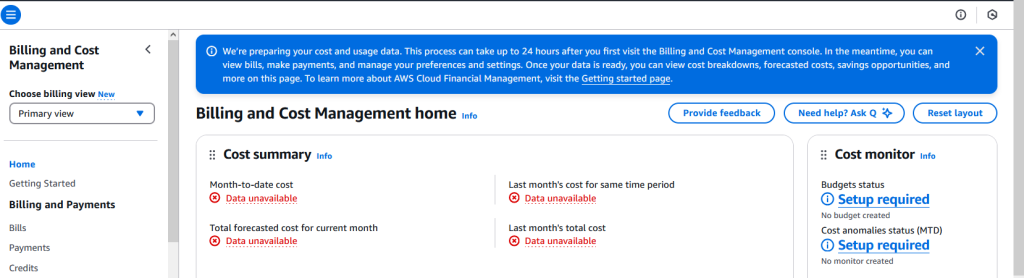
When you first land here, it will probably have a bunch of “Data unavailable” messages
This is because, as it says at the top, you have to wait some time before anything will show here. Once it is working, it will look more like
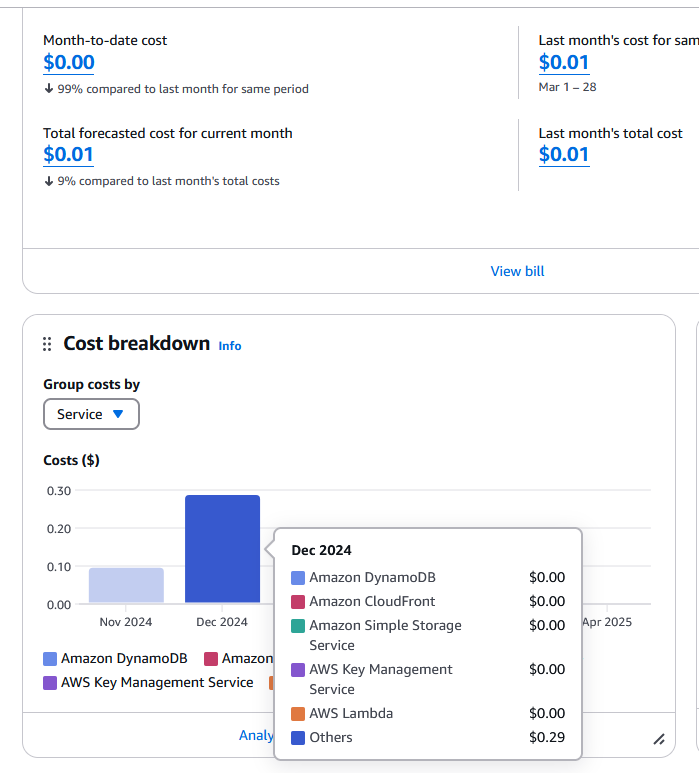
This console will let you dig into your costs and services usage, and make sure everything is how it should be, or help you identify areas you may wish to figure out how to optimize better. Again, beyond the scope of this post, but it’s a critical feature of AWS and can help you avoid nasty surprises.
Step 4 – Setup Billing Alarms
I want to take a quick detour before we continue with setting up and adding accounts to our organization – this is a step that is considered best practice and frankly is only slightly less important then immediately setting up MFA on your IAM users.
Billing Alarms are used to notify you when your spend in a given account reaches a preset threshold. So, if you provision some resource as part of a project in an account thinking that it is perhaps in free tier, but it does in fact cost money, Billing Alarms can tell you “hey, you have spent $10 so far” and give you a chance to course correct before that $10 has a few extra zeros tacked on.
Because we are setting all this up to use consolidated billing (this will be the default once we create our organization), we can set an alarm up in the management account that will trigger when any child account passes a certain amount of spend.
To set this up, head over to CloudWatch by searching for it at the top of the console
You want to look for Alarms on the left side of the screen here – click the little arrow to expand the menu and then click on “Billing”
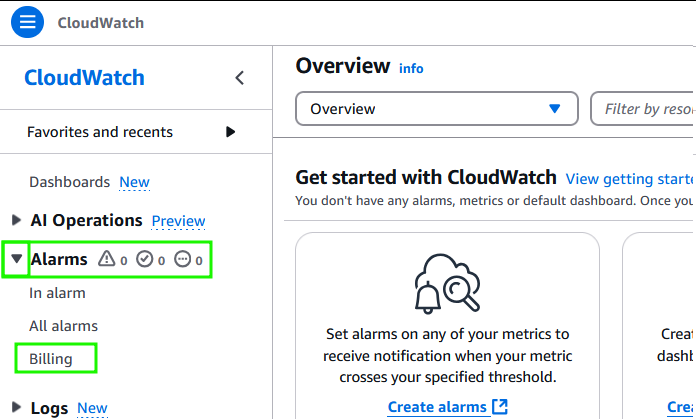
Click “Create alarm”
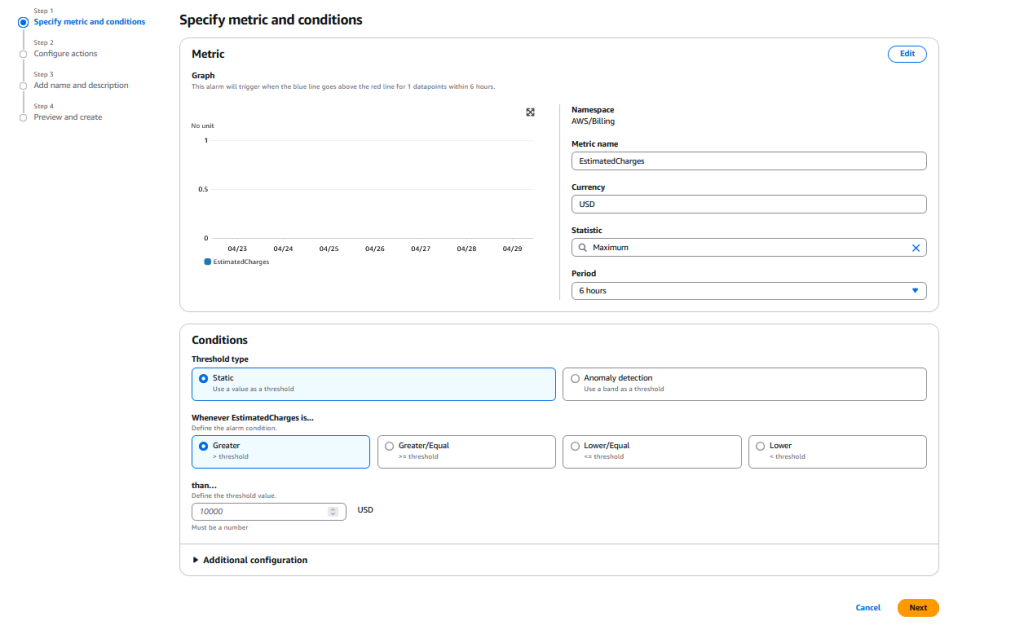
The screen you land on is a little confusing, so let me step through what you need to know.
Quick Tip – you might notice that your region has changed to us-east-1 – this is due to that fact all billing is tracked in this region, even though you might be setting up services somewhere else. This is 100% normal, just make sure you return to your “base” region to continue after if it doesn’t automatically swap back.
This can get complex pretty quickly, and I encourage you to read the docs on how to create more detailed alarms – for now all you need to do is enter some value (lets say $5 – if you breach this you know you have definitely stepped out of free tier) so in the box near the bottom put “5”.
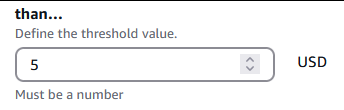
And click “Next”
What we are doing is setting up an alarm that will trigger if the “EstimatedCharges” (which tracks the total estimated charge for the current billing period) is, within a 6 hour period (the minimum for this type of alarm) value becomes greater then the amount you specify.
There are other metrics (you can look these up) but this is the default metric used to setup this type of alarm. You can ignore “Additional configuration”.
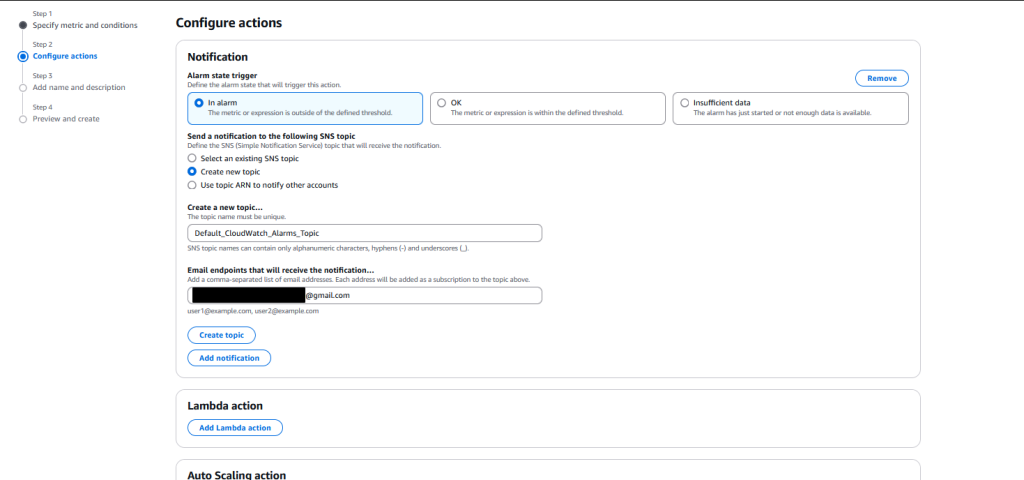
The next page will ask you to configure how the alarm will trigger, and what to do if it does. For this to work, we need to setup an SNS topic. SNS (simple notification service) is an AWS managed services that allows resources to publish notifications to subscribers. It’s Pub/Sub as a service inside of AWS and is very powerful, and that’s all you need to know for this post.
Configure this as shown, and put the email for your account in the Email endpoints box. Click “Create Topic”, scroll down, and click “Next”
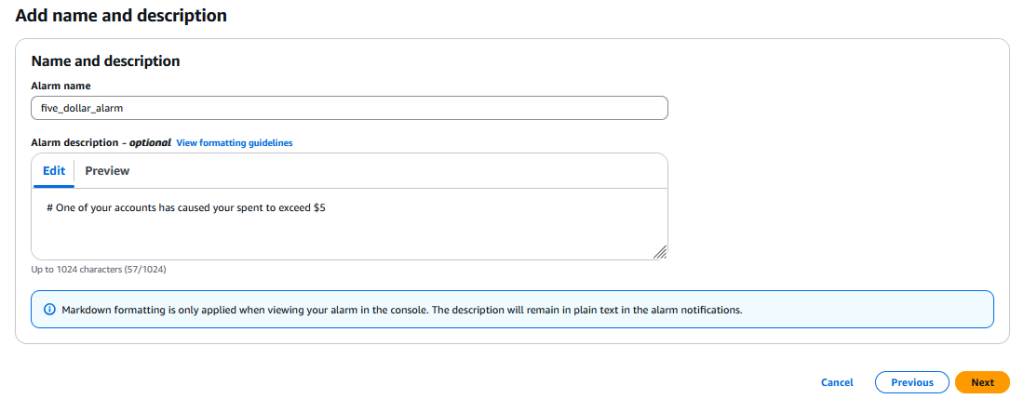
Add a name/description and click “Next”
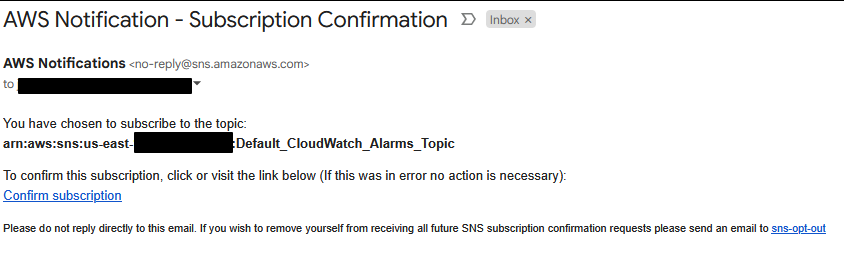
Confirm things look correct, and then scroll down and click “Create alarm” – you should see something like

Quick Tip – take note of that blue message, several AWS services require you to log in to your email and accept it before that email will get any notifications – it will look like
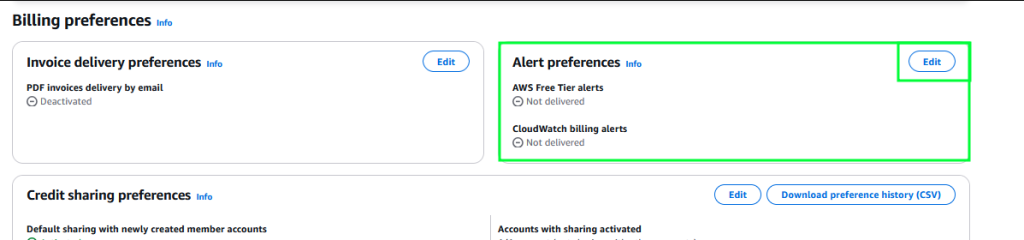
Lastly, we need to go back to Billing and Cost Management and go to our Billing preferences (located at the bottom of the Billing and Cost Management menu on the left of the console)

Edit your Alert Preferences and check the “Receive CloudWatch billing alerts” box, then hit update
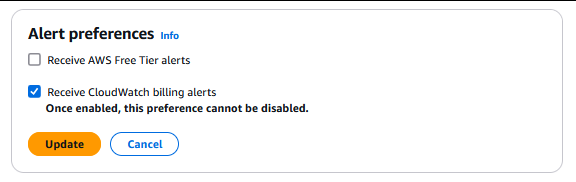
Great, now we can continue on – knowing that we have billing alarms in place and the ability for our IAmAdmin user to view and manage billing/costs.
Step 5 – Setup AWS Organizations
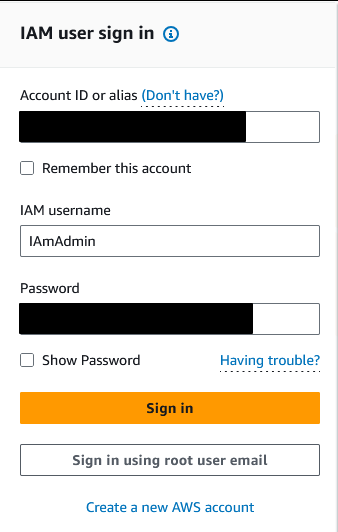
Remember when I told you to write down that log in URL for your IAmAdmin user? You need that now. Logout of your Root user and go to that URL.
Enter the username for your IAM User (In my case IAmAdmin) and your password and click Sign in. If you set up MFA (and you better have…) you will be prompted for the MFA code as a second step. Enter that and finish signing in.
Your view of the console landing page will be pretty much identical to your Root landing page – though if you did add any favorites you might notice they are no longer there. That is because those are tied to a user (and Root *is* a user).
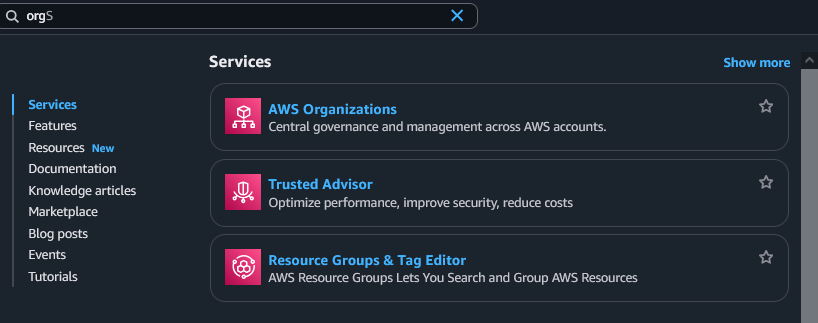
Search for “org” in the top bar and select AWS Organizations
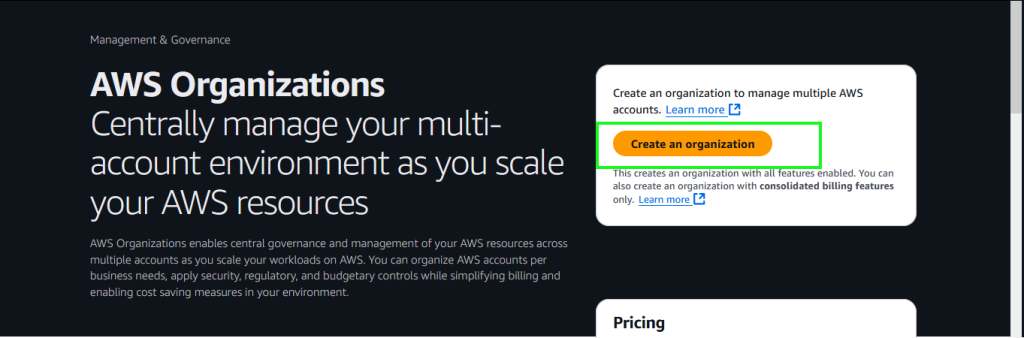
If this is your first time here, you will hit a landing page with an option to “Create an organization” – click that.
You will get a warning about the implications of doing this (which is good to read, but it’s what we want in this case)
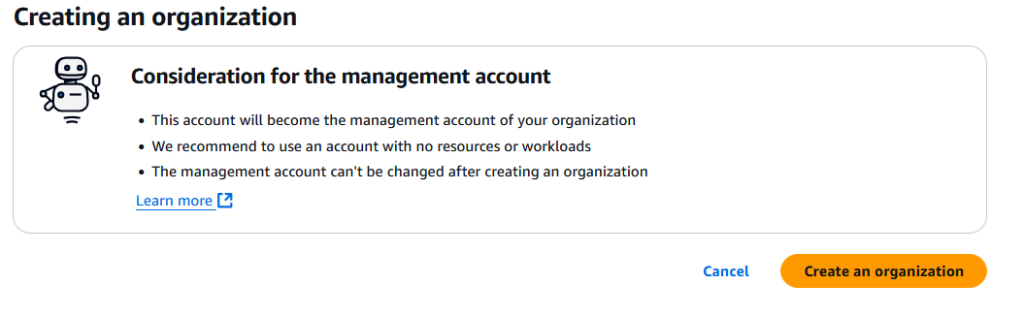
Click “Create an organization” again to continue.
Bam. You just created your organization. Congratulations 🙂 You see the following page
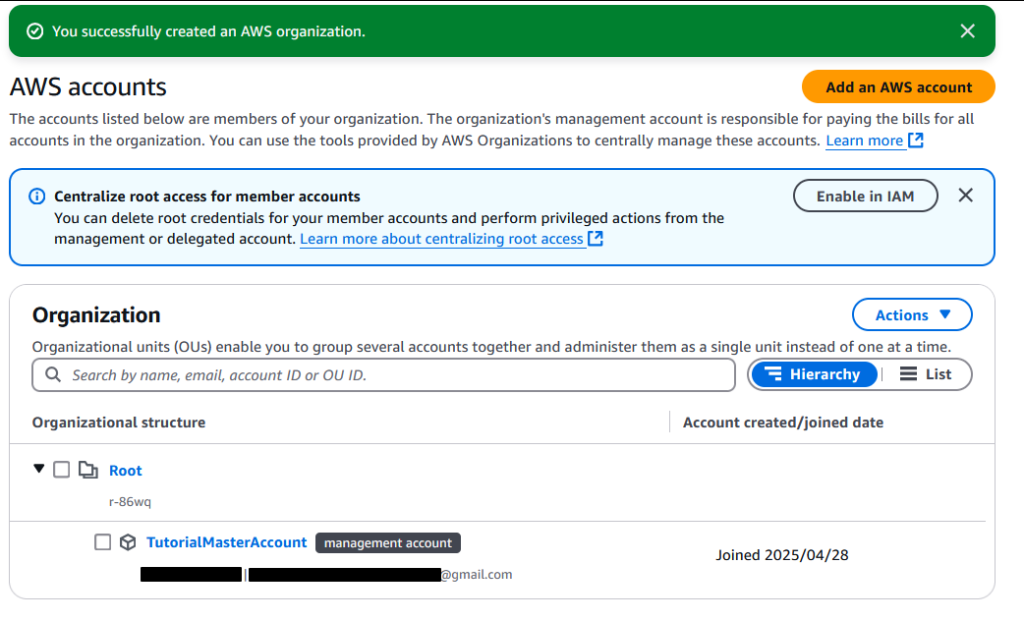
Quick Tip – You can ignore the “Centralize root access” bit – that is for when you add accounts that already exist outside your organization to join yours. Often, a business might acquire another and both might use AWS so the parent business invites the newly absorbed account to an organization. In our case, all the accounts we will make will be created from *inside* our Management Account and will not have their own users… at all. We will be treating them as disposable folders.
That’s… basically it regarding the organization itself. I am now going to present two paths you might consider going forward for structuring your accounts:
Path A) When you have a new project, you create and add a new account to the org, and then assign your SSO user access. This will nest all your accounts under the Root in the hierarchy. You will notice that the primary account (TutorialMasterAccount in this case) is designated the Management Account.
Path B) When you want to create a new project, you create a new OU for that project, which allows you to easily create different environments like staging, dev, prod, etc for a given project.
You can of course mix and match as you please, and you can nest OUs inside OUs – All an organization really does is provide a way to centrally organize and manage cascading hierarchy of accounts and OUs.
In my own personal account, I have a Dev, Prod, and Sandbox OU and I assign accounts into those, so if I did want a dev and prod account for a project, the dev env. would go in the dev OU along with any others of that type. It’s honestly not what I would do if I started over, but it’s what I did and I haven’t been bothered to change it.
There really isn’t any right or wrong answer. If you google “aws organizations diagrams” you will find tons of different ways to set this up. Really, my core advice is to keep it simple unless you have need for complexity, and to keep it consistent (structure/naming). This is the same idea when naming/nesting folders in any other project.
Step 6 – Add your first member account
Fantastic, we are finally ready to add some accounts. This next section is going to be a little arbitrary, as you will want to create and organize accounts in a way that is specific to what you are doing. I am going to show the steps for creating OUs, adding an account, and nesting that account into an OU. From there, it will be up to you in the future to create and delete accounts as needed.
So, from the AWS Organizations console, click Add an AWS account
Quick Tip – the Root “folder” you see there IS an OU – there is no such thing as the “Root” account, the account you use to set this up (that I have been referring to as “management”) becomes the Management Account in the Root OU.
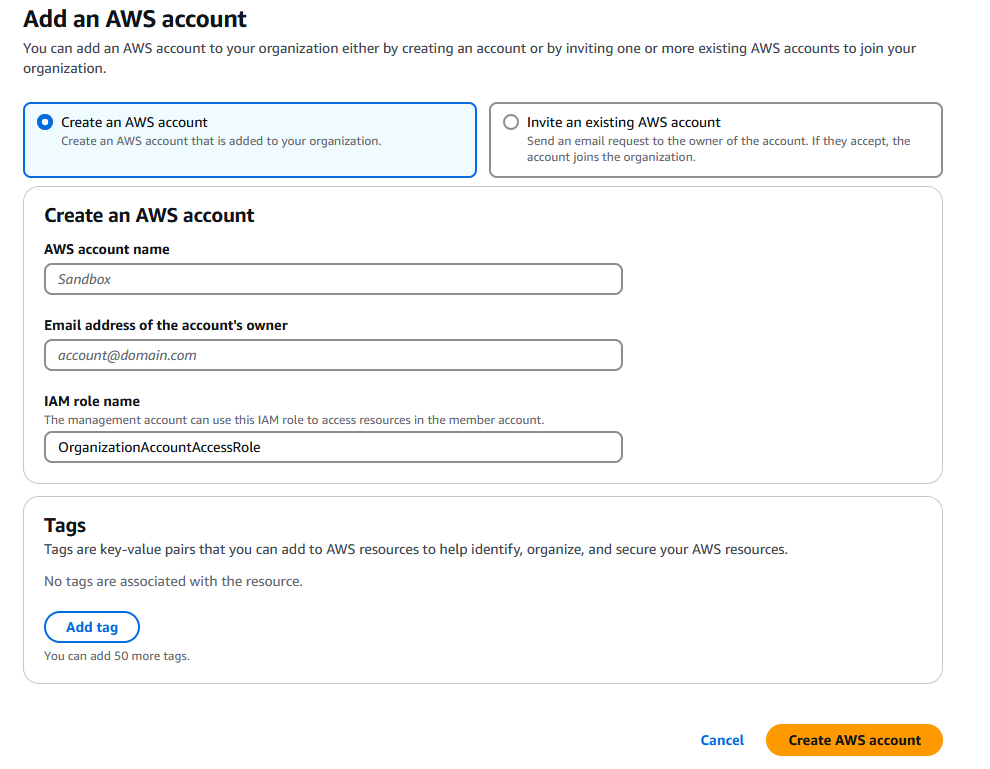
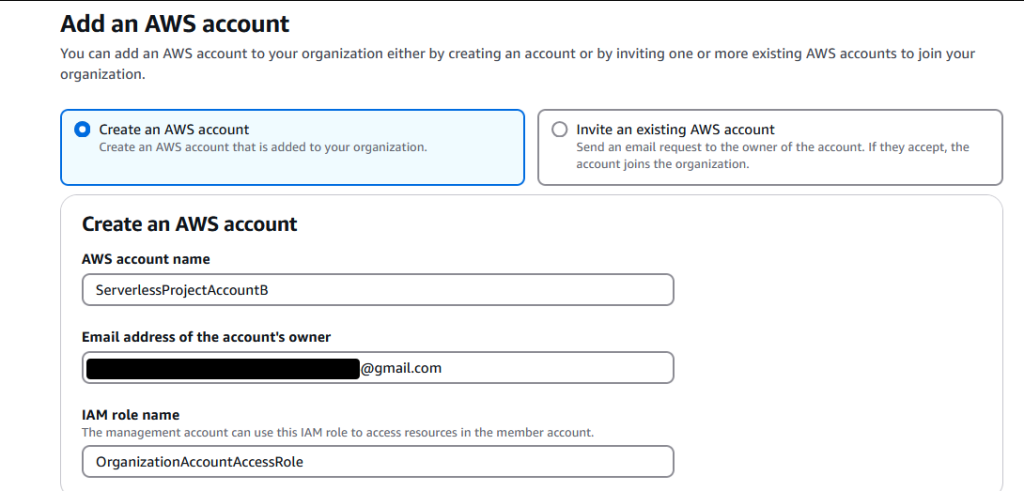
You will want to give this account a name (you can pick one yourself or follow my example and you will need to use a unique email for the account owner (user the + trick I showed earlier so all of this goes to your primary email)
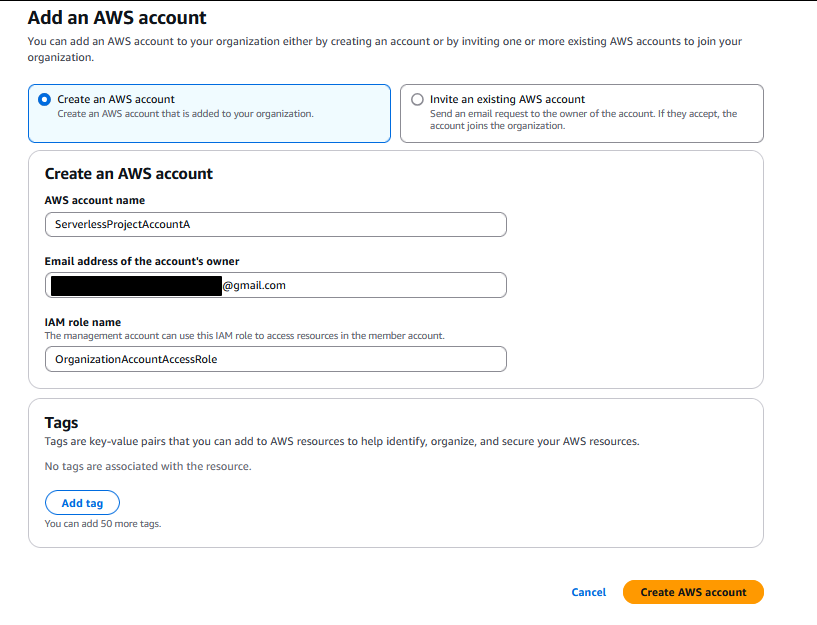
Again, the name is arbitrary – in this example this would be an account for… “Serverless Project A”. I rec. when you add your email using “+” – you put the account name as the addition (IE [email protected]) – again, try to keep things tidy, right now it doesn’t matter but if you end up having dozens of these it very well might make your life a lot easier. Pay it forward, if only to yourself.
The “IAM role name” allows your IAM Admin user from your Management Account to go in and setup things in the new account, such as IAM users for the new account.
Quick Tip – Tags are ways to help mark accounts, resources, etc both to help find/organize but also for billing purposes (though those use special cost tags). Tags are, in general, a good idea, but I am not going to bother with them for the time being.
Hit “Create Account”
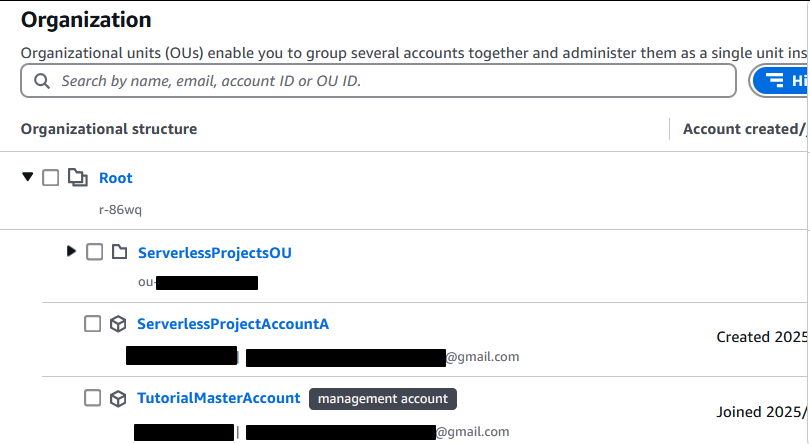
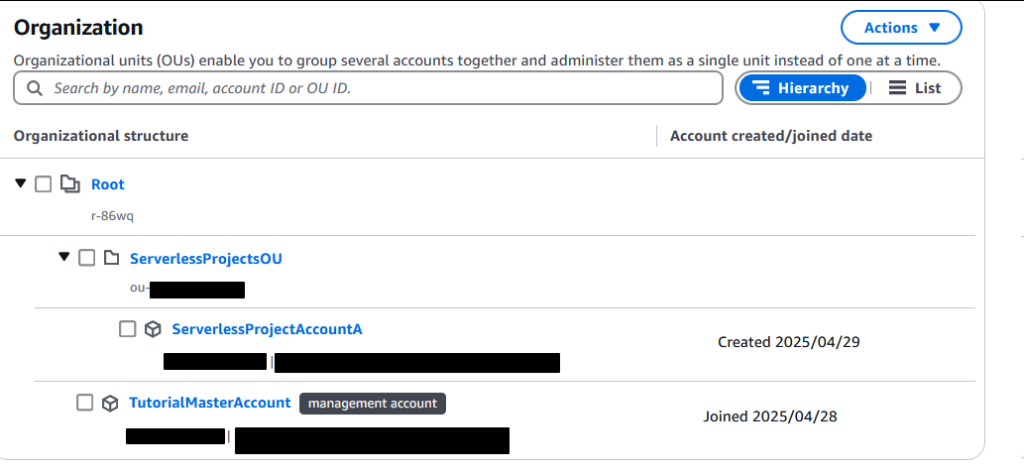
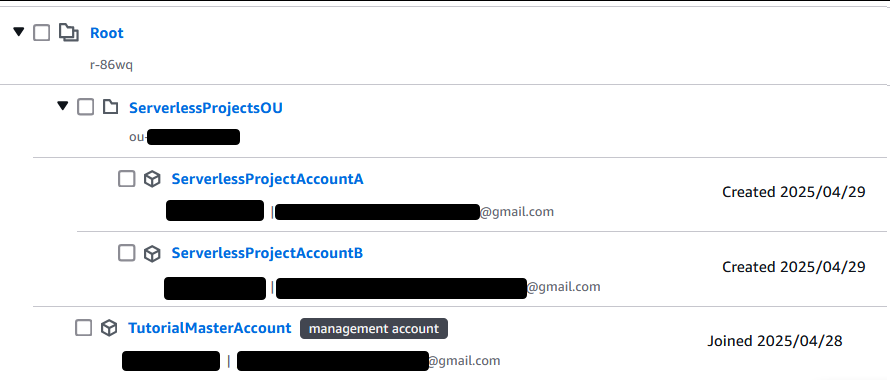
You will be brought back to the Organizations console landing and should see something like

This process can take a few minutes, so if it doesn’t show up right away, don’t panic. Give it a few minutes and refresh the page – after a short while you should see the new account listed
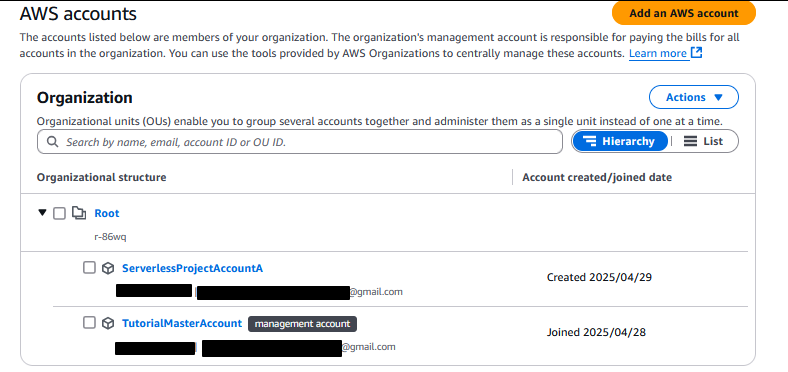
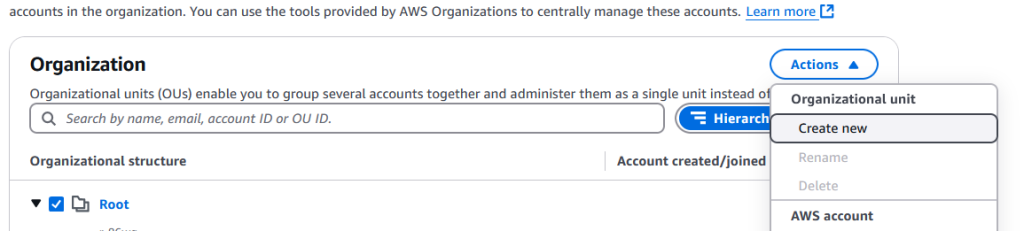
Note how by default, it is also nested under the Root OU. You can leave it here, but it’s a little sloppy and this is a great place to introduce actually creating a new OU. However, if you attempt to do this, it won’t let you – even though it allowed you as IAmAdmin to create and add a new account
This is one of those things that can make you want to slam your face into your keyboard – and it isn’t made as obvious as you might hope. We have a full admin user, so that isn’t the issue. The problem is that the Root OU is the top level, and all other OUs need to be nested in that. So, to actually create an OU, you need to select the Root
Once you do this, give your OU a name (again, this is arbitrary)
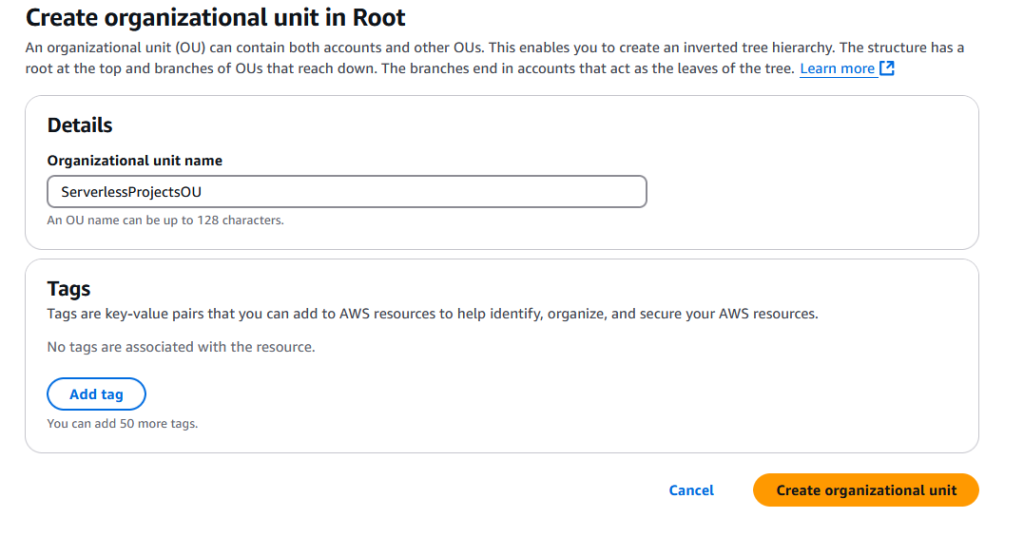
and click “Create organizational unit”
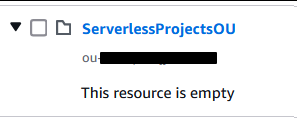
If you expand that new OU it will be empty
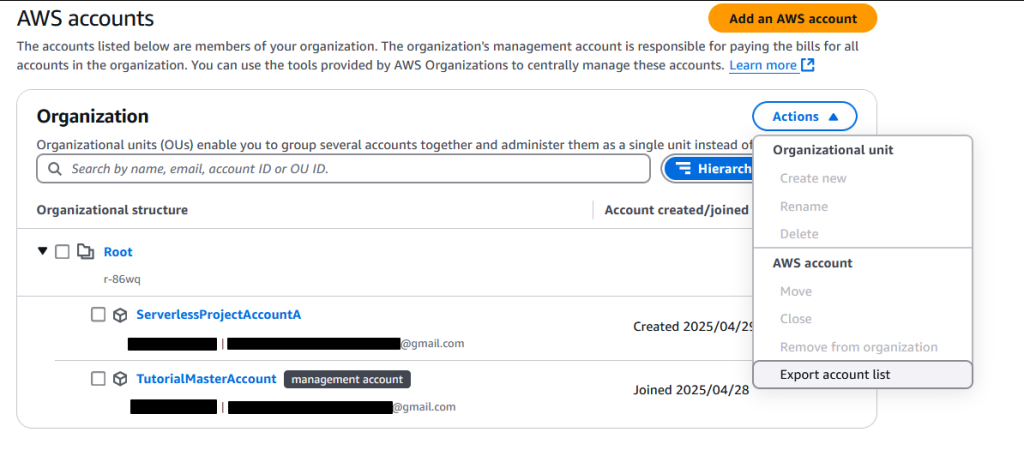
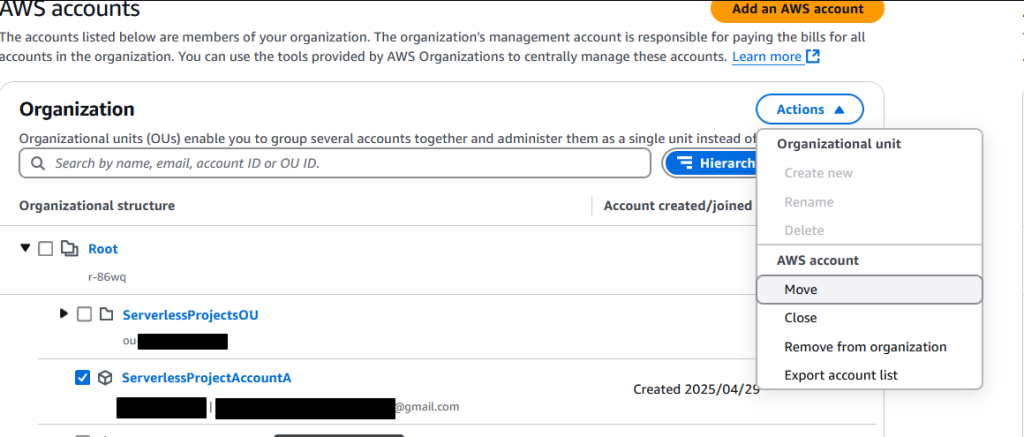
To add our ServerlessProjectAccountA account we need to select that account, hit Actions, and hit “Move”
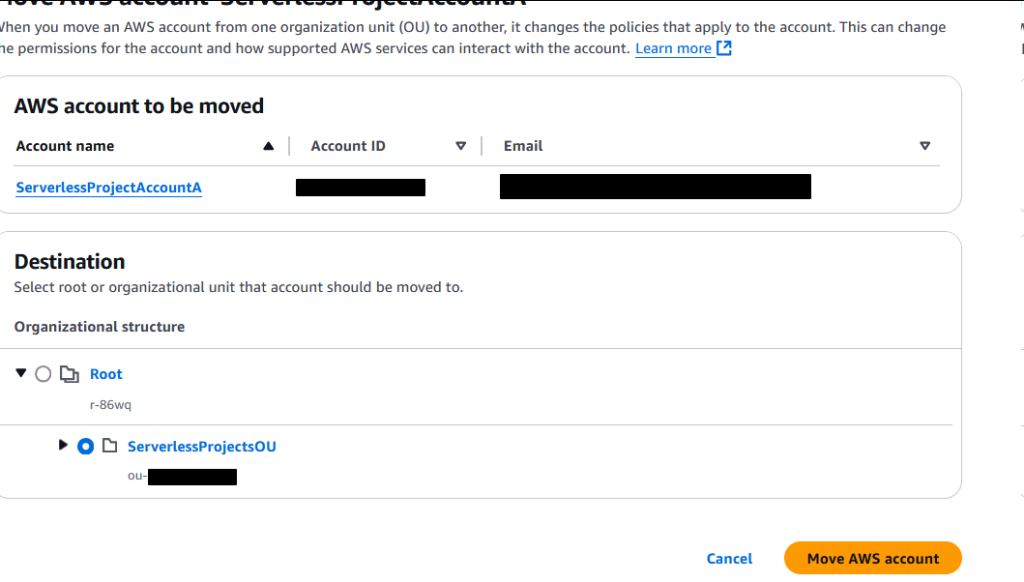
Click “Move AWS account”
Now your project account is nested correctly.
Great – you now know how to create accounts, OUs, and organize them. However, we still have some problems. First of all, we don’t have a way to simply log in to this new account. That leaves use with two options:
A) Role switching into that account using the OrganizationAccountAccessRole we created when we made the account. This is… doable, but not ideal once you have multiple accounts when you are setting them up to be per project. I will quickly demo this though because it is how you would go in and create IAM users specific to that account.
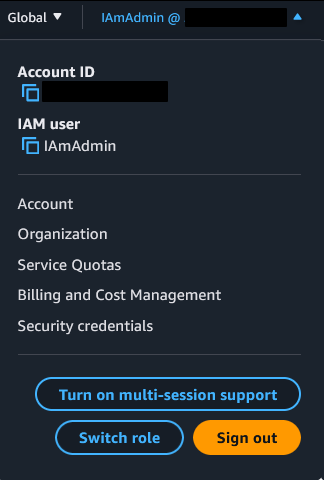
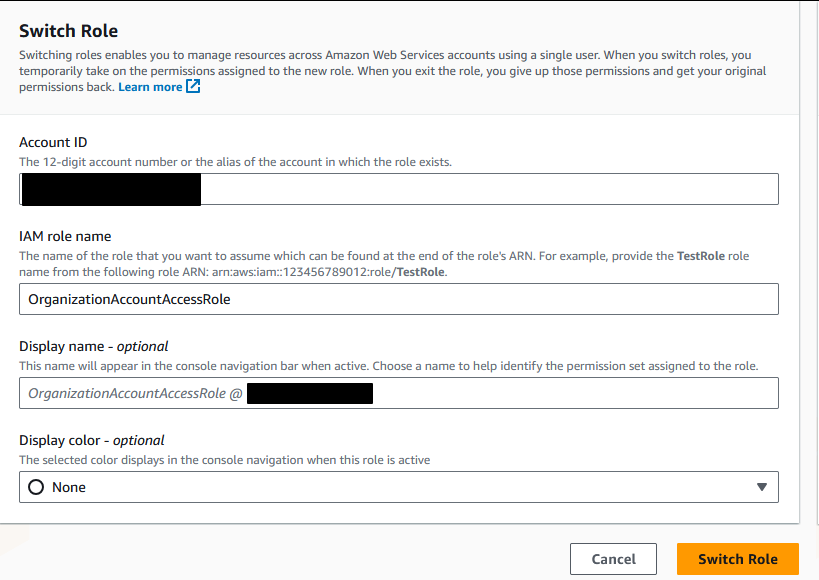
Click the dropdown in the top left of the screen and select “Switch Role”. You will need the role name as well as the ID of the account you are role swapping into. This account number is the field on the left in the above screenshots that is next to the email for that account.
After you do this, it will look like it didn’t work (you will see something like the following)

However that is because the role itself doesn’t have those permissions. You will notice you actually *have* role swapped if you look at the top left of the console.

If you go to IAM in this account and look under Roles for that role, it *will* have “AdministratorAccess” attached, *however* by default only the Management Account can manage.. well accounts, and by extension, organizations (hence the error).
And that is how you role swap. You can swap back by clicking again at the top and selecting “Switch Back” which will return you to the IAmAdmin account in the Management Account. It will return you to whatever page in the console you had been on, so if you had been in IAM, you will have to move back to Orgs.
Quick Tip – Sometimes, you will want to set this up so you can role swap into account not controlled by your org – this requires additional steps such as setting up a trust policy. Just know that what is being shown is how you do it if you are creating what I call “inline accounts”, not external ones you invite.
Step 6 – Setting up SSO/Identity Center
Ok – so we have already covered a lot. Frankly you could stop here and you would still have the ability to create and secure a multi-account setup and how to swap into those accounts. But, without SSO, you would either need to
Create users in each account and secure/keep track of them – and then log in directly to each account one at a time (and those users won’t have access to other accounts, which might be what you want in some cases but not here)
or
Role swap into them from the Management Account
So, we are going to setup SSO. SSO stands for Single Sign-on. It gives you a way to have a single user that you can delegate different levels of access to one or more accounts from a single log in page. AWS changed the name of the actual service to do this to “IAM Identity Center” because having two services starting with IAM isn’t at all confusing. I promise this is all leading somewhere and that at the end it will all be worth it…
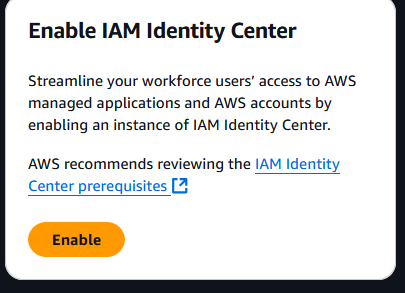
So, search for IAM Identity Center
You can read more about it on the landing page, but for now click “Enable”
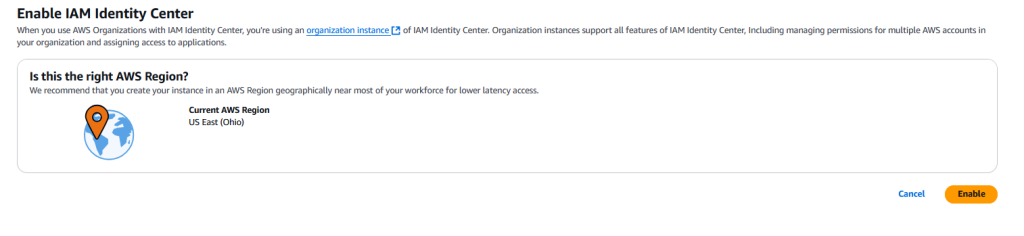
You might find that your Region never reset from setting up Billing earlier… so make sure it is set to the one you want/started with and hit “Enable” to confirm.
You will immediately be hit with a rather (imo) overwhelming page
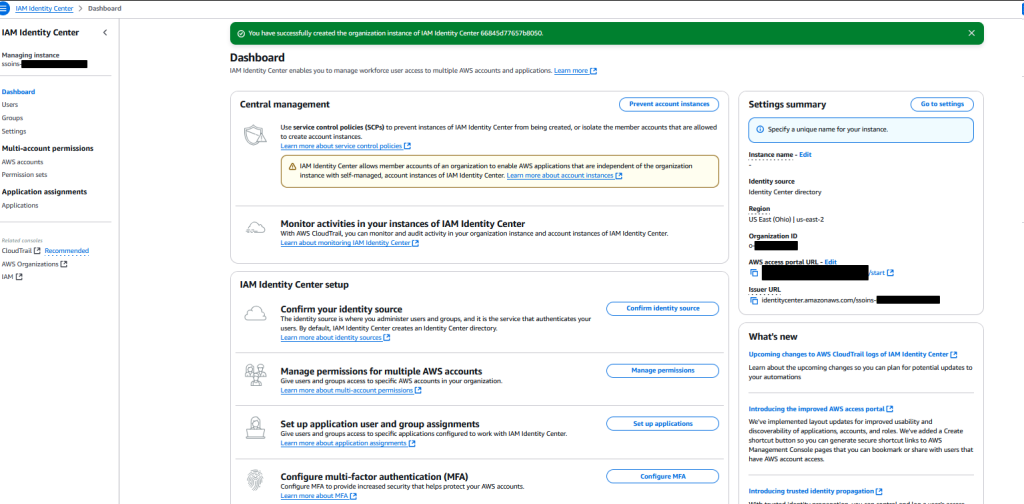
The good news is, for what we are doing, you can ignore most of it. I don’t claim to be an Identity Center expert – I use this service for the setup I am detailing in this guide. However, Identity Center has a lot of very powerful features so it’s something I encourage you to explore on your own.
We care about three things
- Users – We will use this to create our SSO Admin user
- Permission Sets – We will use this to create an Admin Access permission policy to apply to our user
- AWS Accounts – We will use this to assign our user to various accounts so we can easily manage those accounts from a single location
First, click “Users” and “Add user”


Fill out the Primary Information section (you can ignore the rest, since this is for personal use). Click Next, and click Next again (skip adding the user to a group). Review that everything looks correct, and click “Add user”. If you chose to create a one time password like I did, you will see
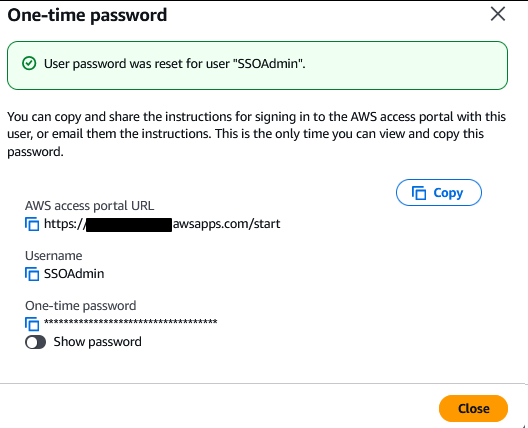
Make sure you copy all that down somewhere safe.

You will see a note saying that the user was added and they have 7 days to log
in using the one-time password. Click into that user and then “Send email verification link”

Confirm the email is right and hit “Send”. In a new browser tab, check your email and click the link to accept the invite. You will be prompted for your username and password, and then to setup MFA for this user. Again, do it.
Once you do, you will be prompted to create a new password
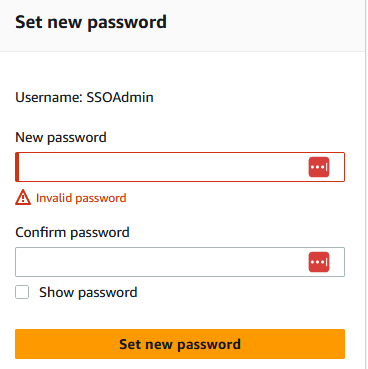
You know the drill.
Once you do all that, you will land on a page that says
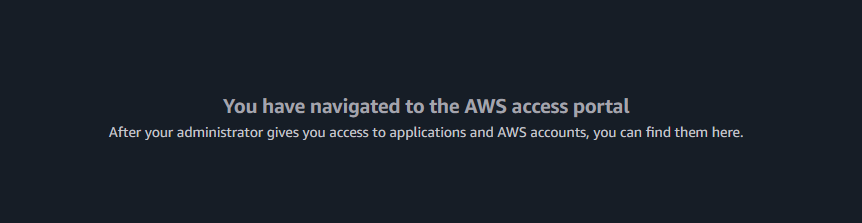
This is because we have not assigned this user any permission sets or associated them with any accounts. Go back to your IAmAdmin console tab and back to SSO/Identity Center.
Next, select “Permission Sets” from the menu and “Create permission set”

Because this user is for our account, leave the defaults selected
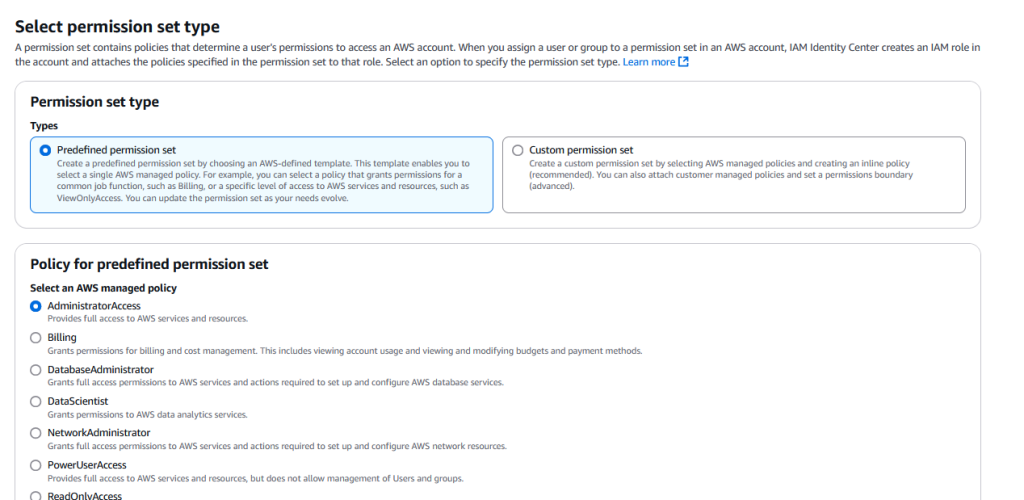
Quick Tip– Permission sets are very similar to a role combined with a policy. You assign users to accounts, and then choose what permission sets they can access those accounts with.
Hit “Next” and really the only thing you may want to mess with on step 2 is changing the Session Duration. In general, shorter sessions are more secure because even if that session leaks it will be invalidated shortly. However, this will cause you to need to log-in fairly frequently so if you are using a personal computer at home, you may wish to set it to something slightly more flexible like 4
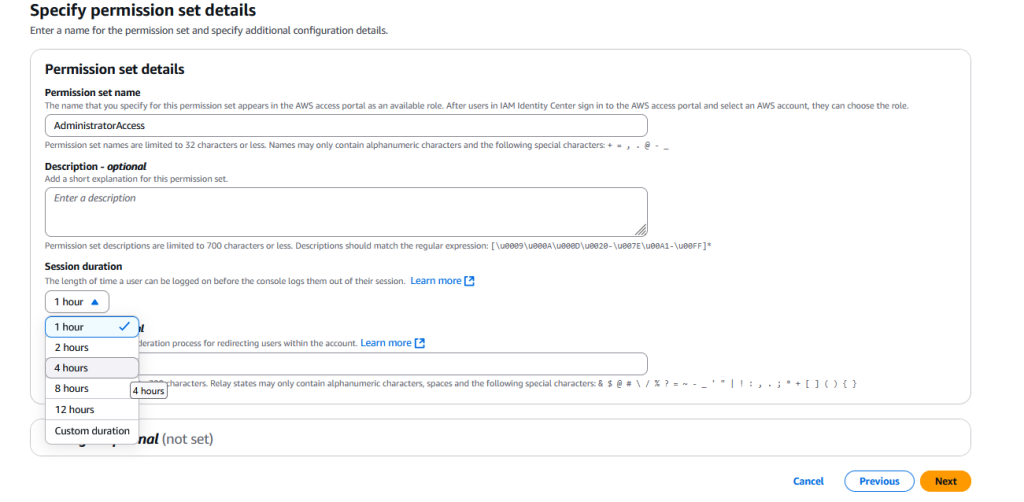
Review and hit “Create”
Now, go back to Users and select your SSO user. Select “AWS Accounts” and “Assign accounts”

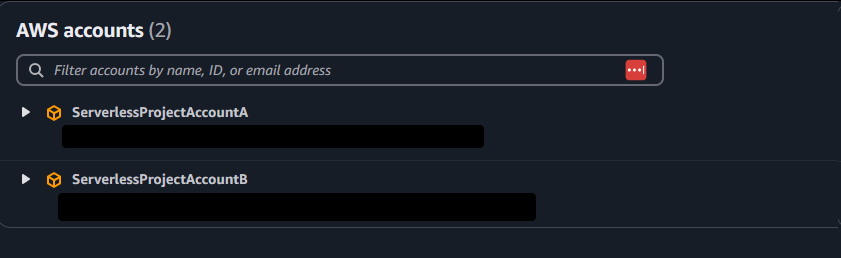
You should see the following (assuming you have followed this guide – if you added additional accounts and OUs they should also appear)
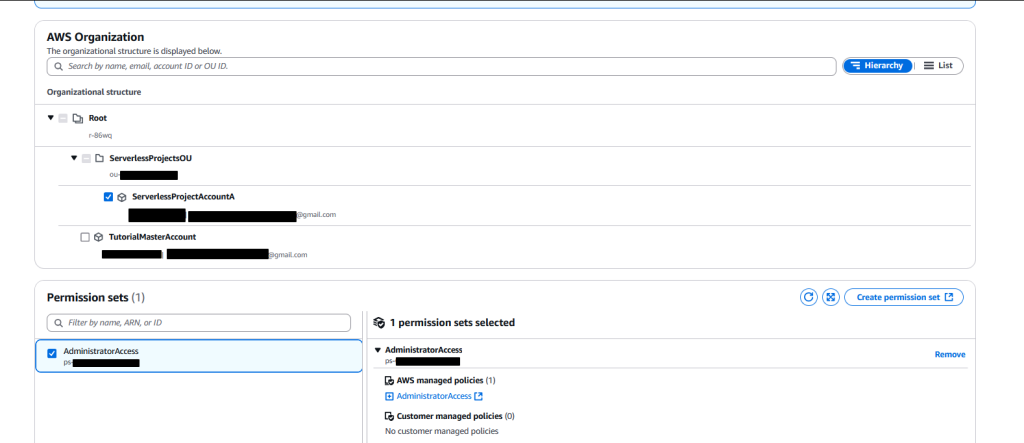
Open the OU for ServerlessProjects and select the account. You *could* give this user access to your Management account – but this is overall less secure. If for some reason your SSO user got compromised you don’t want that to lead to your top level management account being breached. You might have heard the term “blast area” as it relates to security and this is a good example – creating that additional level of separation reduces the blast area if your SSO users gets compromised.
It’s a little more overhead since doing it this way will require you to log in to your IAmAdmin account to add new accounts to your organization, but I prioritize security over convenience in this case.
Scroll down and hit “Assign” – this will bring you back to your User and the account you assigned along with any permission sets will be shown

If you now go back to your AWS Access Portal (which should still be open in another tab) and refresh, you should see
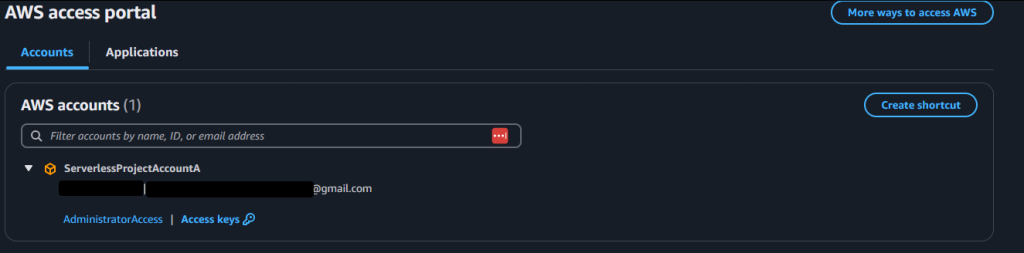
And if you click “AdministratorAccess” (it will be the name of the permission set, if you assigned more then one they will be stacked here and you can pick the one you want) you will be signed into that account as a full admin. The access keys you see will change every time you log in via SSO, which is important to know if you plan to use this account for development work.
“But… I could have just logged in as IAmAdmin and role switched.. this doesn’t save me much time” – now I am going to show you the real power of this. In your Management account, go back to orgs and create another account
Wait for it to be created, and then optionally move it to your OU
Head back to Identity Center and select your SSO user (if you don’t see it, make sure your region is correct). Repeat the steps to add an account to that user and assign the permission set you already created. Now refresh your AWS access portal for your SSO user.
You can do this for as many accounts as you want. You can use your IAmAdmin access to create, delete, and structure accounts in your Organization. You can then assign those accounts with different levels of permissions to your SSO User. You use the Access portal to log in to that SSO user, and then you can easily jump between accounts.
Now, lets say you have a friend who is helping you with a project in one of these accounts. You can create an SSO user and a permission set that only lets them do what they need to (maybe create buckets and upload files in S3) and assign them to the account they need access to with that new permission set. Your other accounts are locked down, and you don’t need to create long term credentials OR IAM users. I really hope you can see how this is powerful.
Wrapping Up
Well it’s been fun, I hope you learned something and feel like you now have a decent grasp on how to sanely manage accounts and user in AWS when you want to treat accounts as disposable. You should feel pretty proud if you got through all of this – you:
- Created a Management Account and secured it
- Created an admin user to avoid needing to log in as root
- Setup your organization, added OUs, and added accounts
- Setup SSO/Identity Center
- Learned about MFA, and various best practices for securing account
- Learned about consolidated billing, billing alarms and touched on other topics like SNS
- Have an easy, flexible approach to creating accounts and giving out access as needed
It was a lot of setup and a lot of steps, but going forward it will all be a lot easier to manage.
Thanks for reading – until next time!