
Setup And Connecting
For this project I am going to use the LTS version of Unity for 2020 (2020.3.x). My exact version is 2020.3.1f1 but I don’t think the minor version matters. What does matter is I know this version of Unity works. Feel free to follow along with 2021.x – I don’t see why that won’t work but I personally think projects should be on the most stable version you can use.
I have already covered the initial setup for getting up and running with a client and embedded server. If you don’t already know how to do this, you should read part 2 followed by part 3 up until the”HANDLING NEW CLIENTS” section. Once you have done that, come back here 🙂
ASIDE: In case you are wondering, I am using the embedded approach again to help keep things simple and to take advantage of what Unity offers. There is some debate in the DarkRift community about how performant a Unity server can be but if Unity ever is the bottleneck, it shouldn’t be for a game of this size. The other advantage this approach gives is the ability to see what the server is “seeing” – this can be great for debugging purposes.
After you have completed the initial setup and confirmed the client can connected, we are going to do a couple of things differently. I always try to write better code then I previously did, and experiment with different approaches. Here are the current changes I have made to this project vs the last one (by the end of part 3):
- Instead of ServerManager.cs containing a list of clients we are going to have a ClientManager.cs class who’s job it is to maintain that list. In an ideal world, a class is responsible for just the thing it does. I have also renamed ServerManager to Server. Server is going to have it’s own instance of ClientManager – I am trying to cut down on the use of singletons and will be building the server a little different this time.
- The ClientManager will take care of adding new client connections to the server and storing said connections.
- The ClientConnection class will no longer have a separate field for it’s ID, but instead just hold a reference to the Client itself.
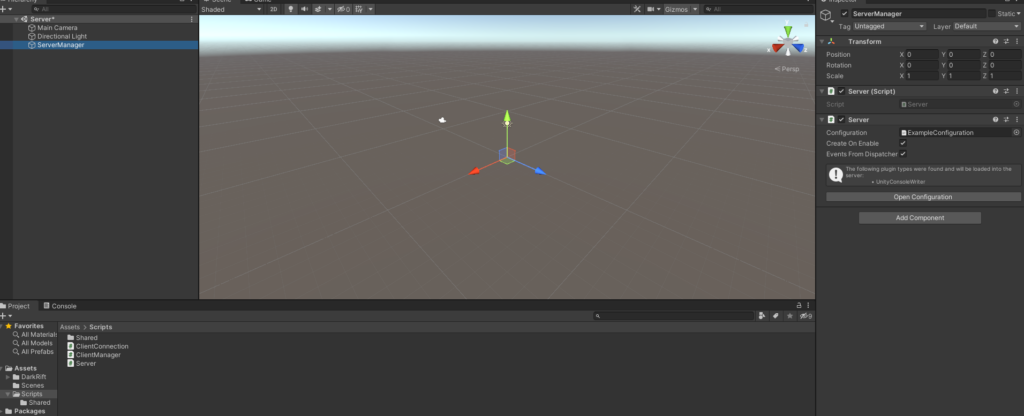
At this point, your server scene should look like:
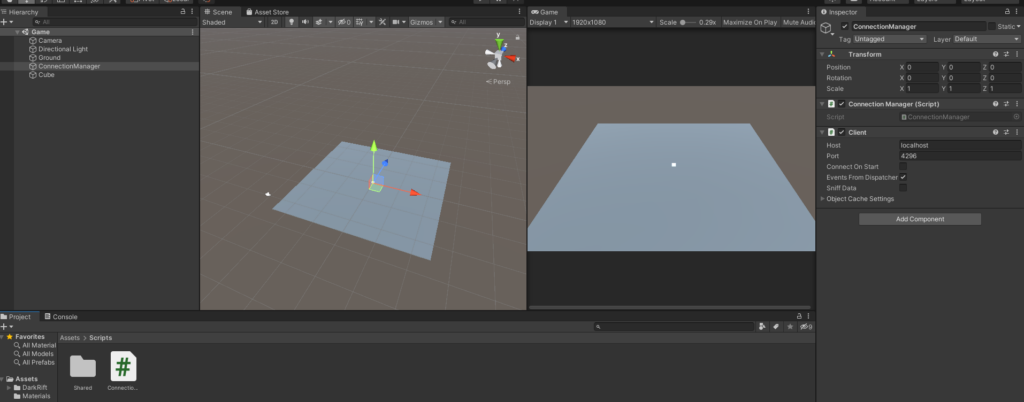
And you scripts should look as follows
Server.cs
using DarkRift;
using DarkRift.Server;
using DarkRift.Server.Unity;
using UnityEngine;

public class Server : MonoBehaviour
{
    public static Server Instance;

    private XmlUnityServer xmlServer;
    private DarkRiftServer server;

    private ClientManager clientManager = new ClientManager();
    void Awake()
    {
        if (Instance != null)
        {
            Destroy(gameObject);
            return;
        }
        Instance = this;
        DontDestroyOnLoad(this);
    }
    void Start()
    {
        xmlServer = GetComponent<XmlUnityServer>();
        server = xmlServer.Server;
        server.ClientManager.ClientConnected += OnClientConnected;
        server.ClientManager.ClientDisconnected += OnClientDisconnected;
    }

    void OnDestroy()
    {
        server.ClientManager.ClientConnected -= OnClientConnected;
        server.ClientManager.ClientDisconnected -= OnClientDisconnected;
    }

    private void OnClientDisconnected(object sender, ClientDisconnectedEventArgs e)
    {
        e.Client.MessageReceived -= OnMessage;
    }

    private void OnClientConnected(object sender, ClientConnectedEventArgs e)
    {
        e.Client.MessageReceived += OnMessage;
    }

    private void OnMessage(object sender, MessageReceivedEventArgs e)
    {
        IClient client = (IClient) sender;
        using (Message message = e.GetMessage())
        {
            switch ((Tags) message.Tag)
            {
                case Tags.JoinGameRequest:
                    OnPlayerJoinGameRequest(client);
                    break;
            }
        }
    }

    private void OnPlayerJoinGameRequest(IClient client)
    {
        clientManager.AddClient(client);
    }
}
ClientManager.cs
using System.Collections.Generic;
using DarkRift;
using DarkRift.Server;
public class ClientManager
{
    private Dictionary<ushort, ClientConnection> ConnectedClients = new Dictionary<ushort, ClientConnection>();

    public Dictionary<ushort, ClientConnection> GetConnectedClients()
    {
        return ConnectedClients;
    }

    public void AddClient(IClient client)
    {
        JoinGameResponseData data = new JoinGameResponseData();

        if (ConnectedClients.ContainsKey(client.ID))
        {
            data.JoinGameRequestAccepted = false;

            using (Message message = Message.Create((ushort)Tags.JoinGameResponse, data))
            {
                client.SendMessage(message, SendMode.Reliable);
            }
        }

        data.JoinGameRequestAccepted = true;

        ClientConnection c = new ClientConnection(client);
        ConnectedClients.Add(client.ID, c);

        using (Message message = Message.Create((ushort)Tags.JoinGameResponse, data))
        {
            client.SendMessage(message, SendMode.Reliable);
        }
    }
}
ClientConnection
using DarkRift.Server;
public class ClientConnection
{
    public IClient Client;

    public ClientConnection(IClient client)
    {
        Client = client;
    }
}
And on the Client side of things:
Great, now we are at the end of “part 3” from the previous series. I want to keep this post focused on the initial setup – in the next post we are going to work on creating a tank for the player to control, spawning it in, and verifying the movement is being sent correctly. See you there 🙂