This is intended to be an easy intro to setting up Catalogs, Items, and Currencies in the Playfab backend for consumption in your game. This is NOT a guide on how to use the Playfab API to work with these items (planning another post for that) but rather to provide a fairly gentle introduction and overview of the Economy section in the Playfab Backend.
I am going to make the assumption you already have a Playfab account and a Title to work with (If not, you can read my guide on the topic).
Playfab offers a fairly robust Catalog/Store/Item API that covers the majority of use cases in most games. You can create bundles, containers, event specific stores, and much more.
Once you are logged into Playfab and have selected your title, you should see an option for “Economy” on the left side under the “Engage” section. Lets get started by going over Currencies, and then we will move on to creating catalogs, items, etc. Click on “Economy” and at the top click on the “Currency” tab.
Currencies
The Currency tab allows you to define various currencies for use in your game. Common examples include coins, diamonds, ether, or whatever you want to call yours. Often games will have multiple currencies, with at least one “hard” currency (bought with real money and spent on in game items – “Diamonds”) or “soft” currency (earned in game and spent on in game items “Gold Coins”).
Lets create a couple of currencies for our game (our game being a fictional project that will use said currency). Click on “New Currency” (top right of the screen). You should see something like:
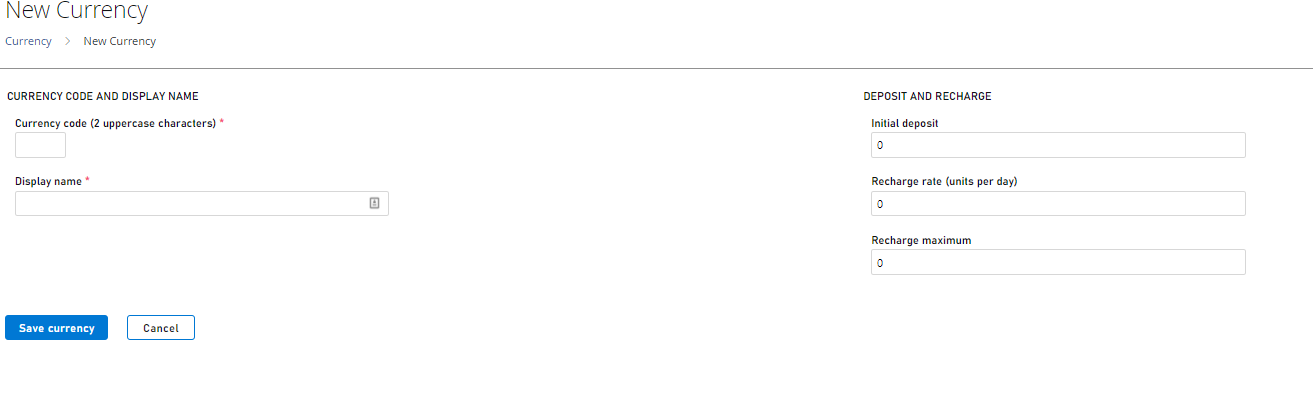
- Currency Code: A code you pick for your currency. “GC” for gold coins or “DM” for Diamonds, etc
- Display Name: What the users will see. Internally you will most often refer to the code.
- Initial Deposit: Defines how many units of this currency should be granted to the player when they first make an account, etc. You may want to start players off with a small amount of premium currency for example.
- Recharge Rate: Set this if you want the currency to automatically recharge – you might use this if you have a hearts/lives system in a match 3, with hearts/lives *being* the currency. If you set this to 24, it will recharge at a rate of 1/hr.
- Recharge Maximum: Caps the amount a player can receive from automatic recharging. You might want to limit the max lives a player can have, even if they would recharge 1 every hour. You can of course give a player more, this is just to limit a player walking away and coming back with 1k lives, for example.

There is one exception to the above – the code “RM” is already taken and used to indicate “Real Money” – you cannot use RM for your currency code as Playfab has already reserved it.
Granting Currency to Players
There are a few ways to grant currency (well, anything really) to a player:
Option A: CloudScripts – If you don’t have your own game server or have a game that simply doesn’t make use of a server, you can use CloudScript calls directly from the client. These act as a middleman between the client and the PlayFab backend. They are secure, and won’t allow a malicious client to have their way with your back-end *cough*. CloudScripts are an entire topic onto themselves and I won’t be covering them here, but keep in mind they are something you can make use of.
Option B: Server as a middleman – If you have your own game server, say for a FPS or persistent world type game (MMO, etc), you can safely make Admin/Server API calls to Playfab from there. Client passes input, server screens input and if the request is valid makes the call on the clients behalf, returning success or failure, and then informing the client of the result.
Option C: Authoritative Client API calls – you *can* allow a client to make calls to the Playfab API directly from the game itself, however this is typically not a good idea in practice because a hacked client or malicious user could then add whatever amount of currency they wanted to their account. In-fact, Playfab will by default *not allow* the Client API to make these calls.
Option D: PlayFab Events – PlayFab has this thing called “PlayStream Events”. This system is very powerful and you can do a lot with it. In this case, you can have PlayFab give a player items/currency on certain events. PlayFab has a bunch of built in events you can hook on to (such as when a player first makes an account) that give you a chance to add additional logic. You might want to grant new players a starter pack when they first signup, or a special item when they reach a certain level, etc. PlayStream Events let you handle this from the PlayFab backend and away from your game logic/code.
There are some use cases (I… guess) where you might not care if the player “cheats” – maybe what you care about is time in game/ads watched and not the currency they have. If you do want to allow clients to make calls like this, you must Goto Title -> Settings -> API Features and under “Enable API Features” check the permissions to allow the client to do so. Don’t do this unless you are *sure* you know what you are doing, as it can ruin your game if you are not careful. This is a “you can” not a “you should”.
Catalogs
Now that we have a couple of currency options, the next step is to setup our first Catalog.

A Catalog is meant to be used as a place to hold every item in a version of your game (don’t worry, we can split up catalogs later). Lets say you launch your game as version 1, you would have a catalog version 1 as well. Then in the future, you might update your game, adding or removing items. When you do this, a new catalog should be made to match. This lets you filter available items by game version. Maybe an item is no longer sold in a future version, so the current catalog should not contain that item. This is also a way to help you manage legacy items for players that started at an earlier point in the games lifespan.
Once you are logged into Playfab and have selected your title, you should see an option for “Economy” on the left side under the “Engage” section:

When you click it, the first option you will be presented with is the ability to either create a new catalog or upload JSON. While I will provide an example of what such JSON might look like, for now we will be setting this up by hand.

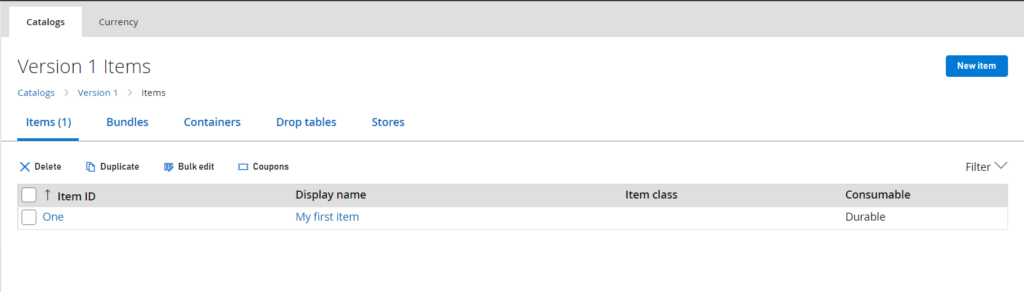
By default PlayFab will insert an item for you with the Item ID of “One”. We will delete this shortly, but for now click it (The name below Item ID). A catalog must have at least one item, if you delete this before we add new items the catalog itself will disappear. Lets break down the tabs at the top, starting with Items.
Items
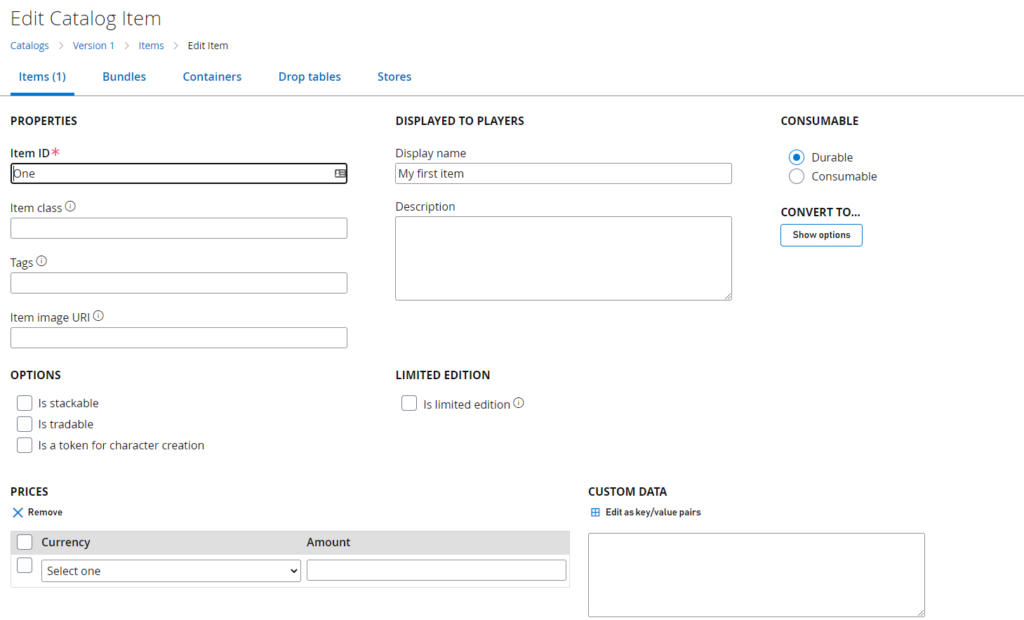
Properties
Properties are used for back-end and game logic purposes and are not (typically) player facing.
Item ID: This is the ID inside PlayFab for that item. This is what is used in various API calls to grant the item, etc. As a small aside – if you are planning you use the Google Play Store (I can’t speak to iOS) to handle RM purchases you will want to make *sure* the ID here matches the ID for the item there.
Item Class: Used by your code to help determine what do do with an item once you get in on the client. A good example might be “Quest” – you can return a list of items and tell your code to put any item marked as a quest item into the quest item part of a players inventory, etc.
Tags: Another piece of custom data you can add to use in your game. Useful for sorting in an in-game store (If you play League of Legends, the filters in the item shop are an example of a place you can use tags for example).
Item Image URI: Potentially useful in a game if you want to load images from a database but typically this would be used if you had integrated PlayFab with something like Facebook. Most likely the images for your items in a game would be stored in the game itself to avoid additional web calls and speed load times.
Displayed To Players
Player facing information about the item.
Display Name: What is displayed to the user for this item, pretty self explanatory.
Description: Optional text you can use to put in a description for an item to display to a player. If your item was “Magic Sword” you might put “This sword glows with a pale blue light” or such in this field.
Options
I am including options, limited edition, and consumable toggles in this.
Stackable: If an item is marked as stackable, PlayFab will only return one instance of that item along with a value that will be increased or decreased. This has two big advantages – first, if you have an item like “XP Booster” instead of giving a player 10 seperate boosters you give them a single booster with 10 uses. This is much cleaner and much easier to manage. The other use is for game where you might have a stackable resource (ore, wood, orc heads, etc) and instead of having 100 separate instances of said resource the player has one with an associated amount – think RPG or RTS style games. TL:DR – it works how you think it should.
Tradeable: Mark this option if you want this item to be able to be traded among players directly using the PlayFab API. See the Social API for some examples of how this might be implemented.
Token for character creation: This is an option to look into if you have a game that involves unlocking characters – pretty much any Gacha game. Characters, as far as PlayFab is concerned, are distinct entities that a player can own with their own inventories, stats, etc. You might use characters in an MMO but in that case you wouldn’t use this option. Character tokens are items a player can buy that are then used to unlock a premade character in your game like a virtual pet. If you are using the Server API you might not need this, but for the client to unlock a character you would use this token to verify that the client has permission to use said character. It’s complicated (and by that I mean it really needs it’s own post and maybe I will do that at some point…)
Limited Edition: You can use this option to make an item “limited” – checking this box will prompt you to specify the amount of this item you want to have available – each time a player purchases this item, that value is detracted and when it hits 0, nobody else can buy the item.
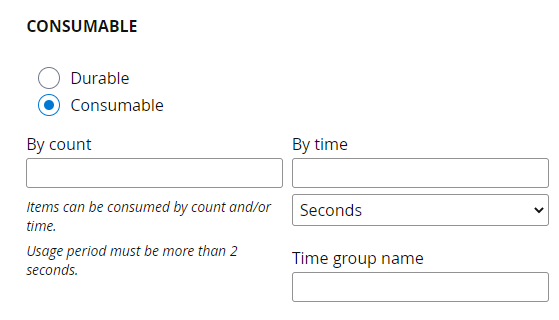
Consumable: this controls if the item persists after use or is it limited by use amount. You might often combine this with the stackable option from above (XP boosters). Setting this to “consumable” will allow you to set additional options to control how it is consumed:
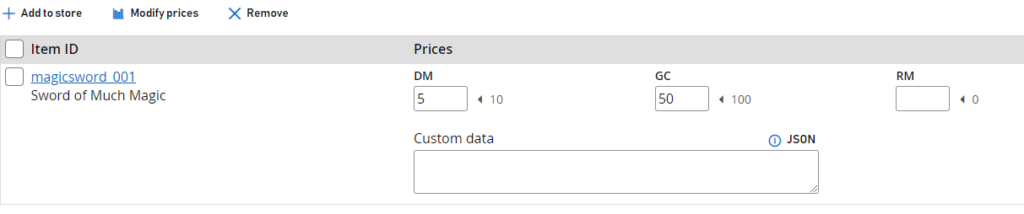
Prices
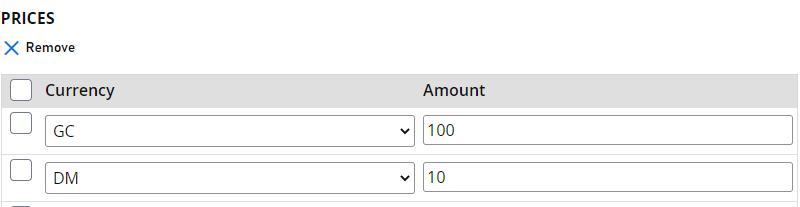
Prices are where you can select multiple virtual and RM values to control the price of this item. You might want the item to only cost in game currency (like a player buying an item from an NPC) or multiple currencies (maybe a large amount of in-game and a smaller amount of RM/Premium). This is a good way to make your game (at least feel) not P2W because you can technically still buy something for a currency you obtain from play. 10,000 gold or 10 diamonds, for example. You can also set a flat RM price if you so choose.
Custom Data
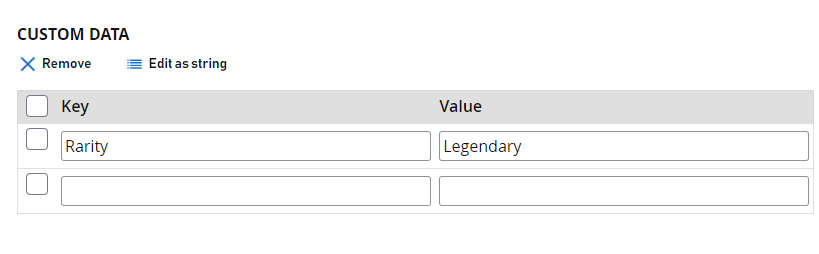
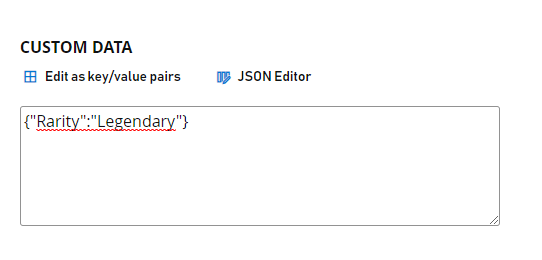
Lastly, we have custom data – this is where you can set key value pairs that are specific to your game that you can use in your code to do… whatever you want. You can also edit this as a string:
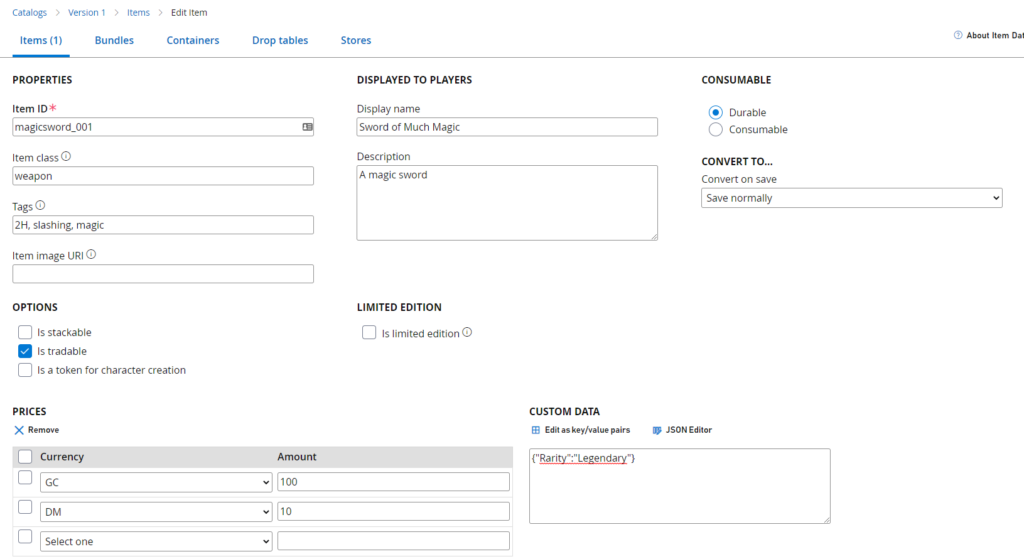
Here is a complete item example for a magic sword:

Bundles
Bundles are, in PlayFab’s own words, “collections of items and virtual currency that unpack into a player’s inventory when granted.”
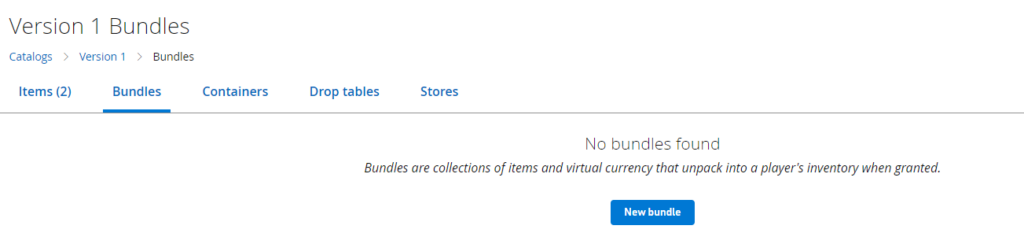
When you click the Bundles tab you will see
Note that the bundle is tied to the catalog version. I have gone ahead an made a second item

Since a single item does not a bundle make. The New Bundle UI is very similar to the item UI with a few differences – specifically:

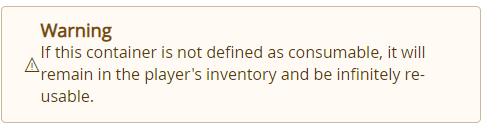
As you can see from the warning, a bundle is typically meant to be consumed and then “unpacked” into a players inventory on purchase (keep in mind I am talking about the inventory for the player or character in PlayFab, not the UI/Inventory in your game (though you will use the data in PlayFab to populate your game). The real thing to pay attention to here is the “Bundle Contents”.
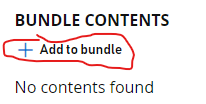
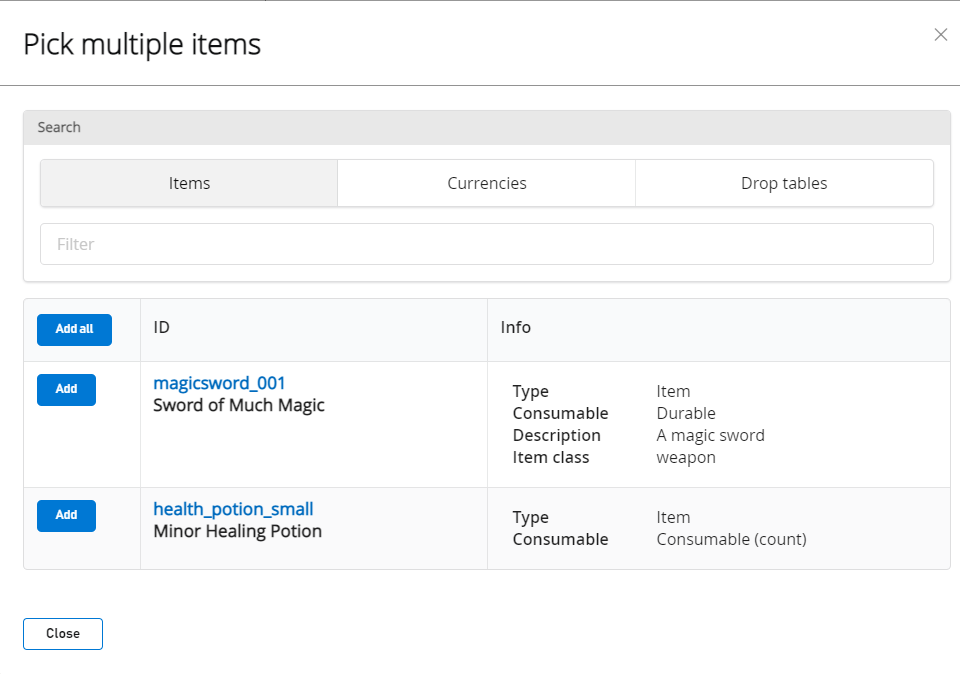
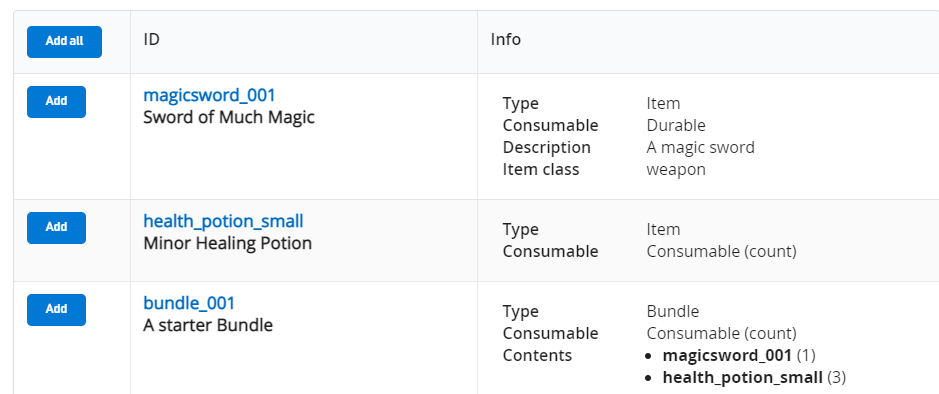
Clicking that will bring up a new UI

ASIDE: You don’t actually have to assign a price to items/bundles, perhaps it isn’t something a player can purchase and might instead be a reward or boss drop.
Saving will return you to the bundles listing where you should now see (assuming you named yours the same with the same items)

ASIDE: I am planning another post (as stated before) to cover how to actually get/use all of these things but for now just know that is how they work.
Containers
While similar, bundles and containers are not the same thing. Bundles are items that come with other items included. Containers are items that have other items “inside” which are not added to the player inventory until the Container is opened. Technically, containers are what you would use for “chests” and “loot crates” while bundles allow you to add several items at the same time to a players inventory. Containers can contain bundles but not the other way around. In a way, you can think of Items, Bundles, and Containers as increasingly complex data structures that can each hold instances of the others (an item would be a single instance of an object, a bundle is kind of like an array of items, and a container is a class that can contain multiple instances of items and bundles (and even other containers).
The thing that makes containers “special” (besides that) is this option:
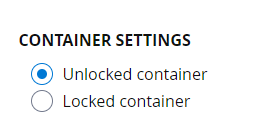
And unlocked container might be a chest that the player can open at will. A *locked* container on the other-hand requires a separate item to open. I have gone ahead and added a new item to our catalog to demonstrate

If you select “locked”
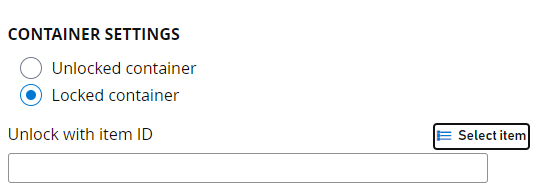
you will be prompted to select an item (in this case the key I made)
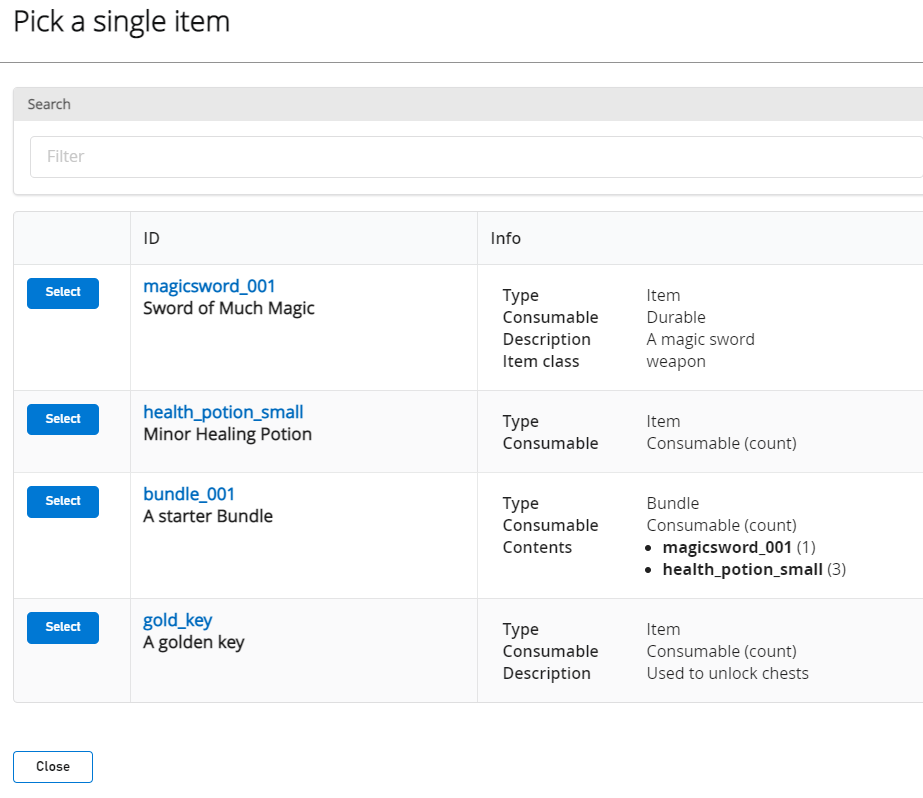
ASIDE: Make sure your containers are marked as consumables
Without actually writing code, I can’t demonstrate here how to use this, but basically you will make an API call when a player has said container and you will check to see if that player also has the required key. If they do, PlayFab will return a success and you can go from there like anything else. If you save your container (make sure to also add items) the result looks basically the same as the bundle UI

Drop Tables
What if you want to add some juicy RNG to your items? Well, drop tables are how you do this.
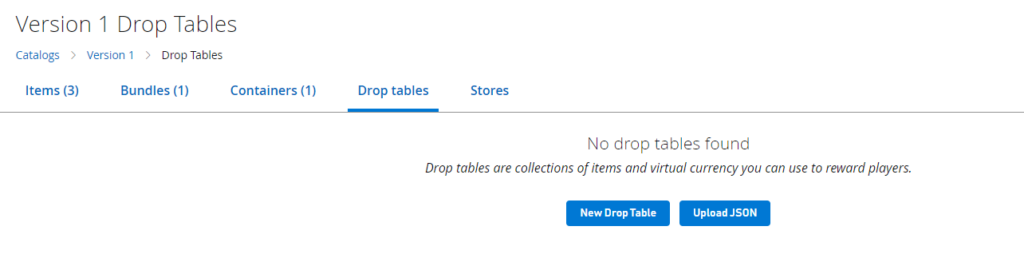
Select new drop table. Give the table an id and add some items
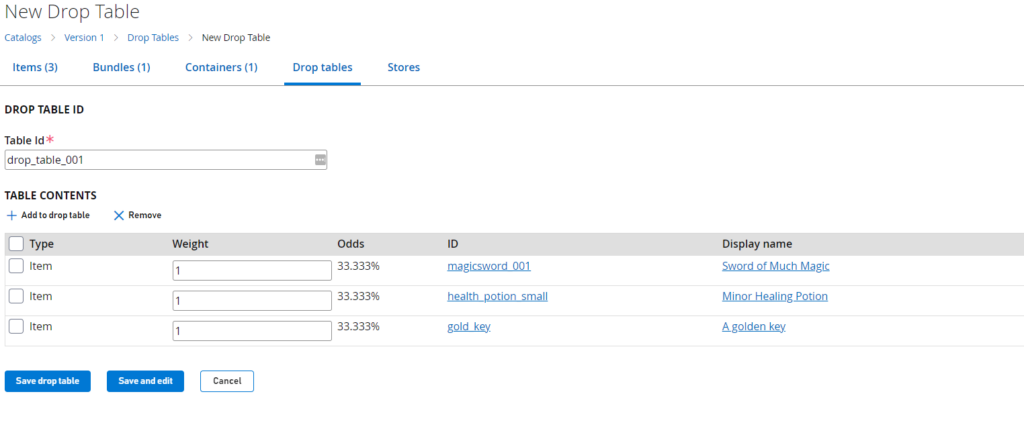

Now here’s the thing… drop tables, besides being able to include bundles and containers, can contain OTHER drop tables. I have made a second table

And then went back to table 001 and added that table as a drop item
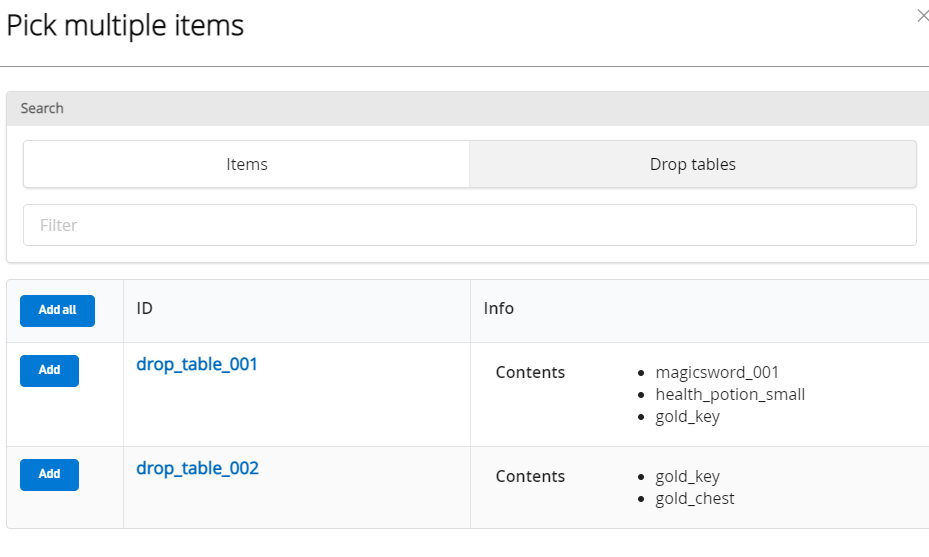
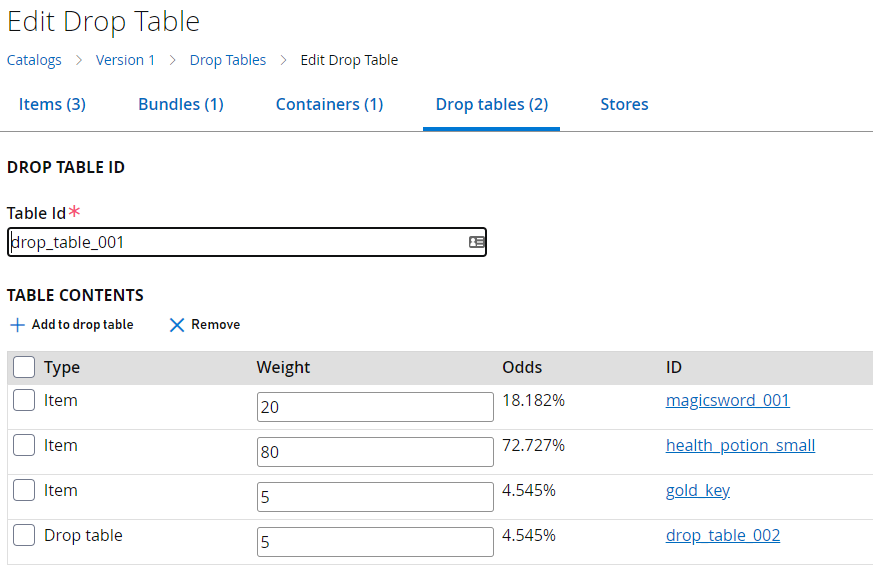
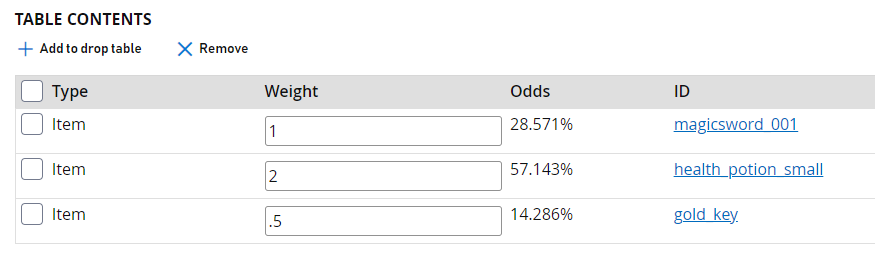
If you wanted to have a small % chance of a drop table containing something that contains a 100% chance of a key/chest, you would instead make a bundle with those items and have that be that bundle be the single item in your second table (so there would be a small chance that a bundle with a 100% chance of a key/chest) – drop tables with multiple items cannot have multiple things set to weight 100 (two items weighted at 100 would result in a 50% chance of either).
I hope you can start to see the mildly insane things you can do with this system. Containers with drop tables of containers full of bundled items. It can get pretty deep.
Stores
Finally, we have stores. Stores are in essence sub-catalog. If you have ever played a game with a holiday event that has a special store for that event, this is that. The store UI is a little different. First we have the store properties (name, id, description, etc) followed by the store contents and finally “segment overrides”.

The first section is just like the rest – you give the store a name, id, description, etc.

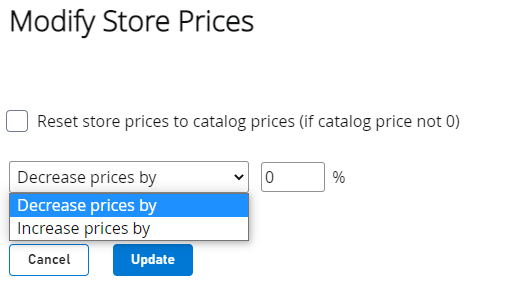
This is part of what makes the store special. If a player accesses the store, you can adjust the values for price and data for that item if it came from THIS store. Maybe you want to sell items at a discount but only for the event. Easy.
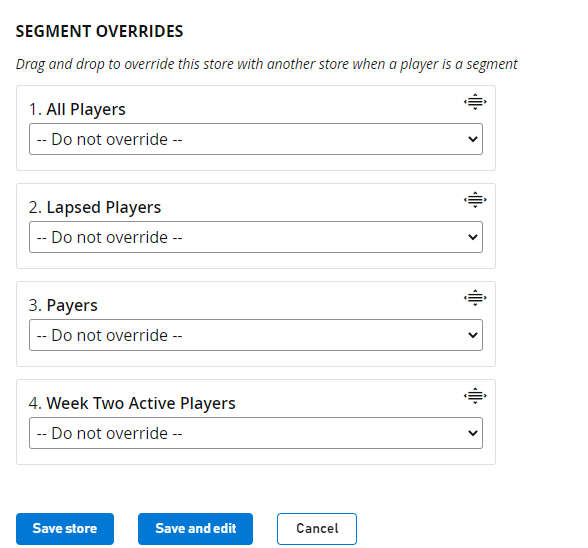
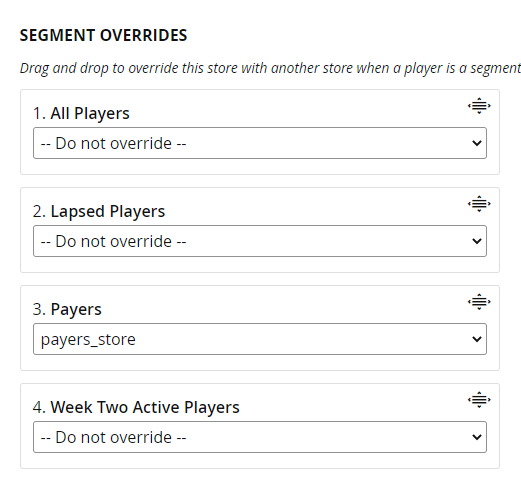
Lastly we have segments. At this point you can’t really do much with the setup we have so far. Basically the idea is you can have multiple stores and you can present different types of players with different offers. You can see open three “Payers” – this segment is for players who have spent real money in your game. You might want to offer a special discount to those players specifically. For the sake of demonstration I have made a second store for said segment:

This is incredibly arbitrary and fairly useless but I wanted to show you how to set it up. Segments are created and managed under the Players section of PlayFab
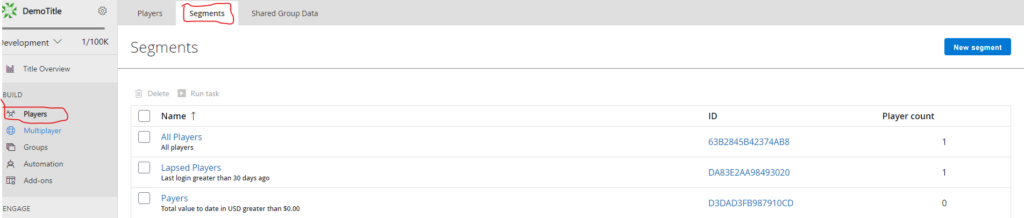
And you can adjust what qualifies a player for a segment there. That is not the point of this post however, just know that is where that setting exists.
If you go back to the root of “Economy” (having followed along) you should see something like:
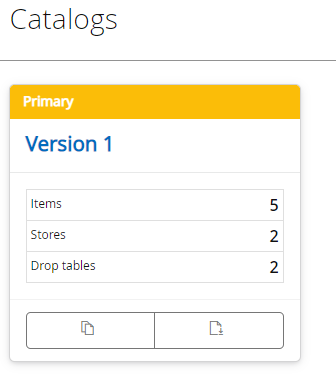
It is typically considered best practice when adding new items to an existing game to make a new catalog. Another reason for versions is to allow you to control what items return to a player, or if you once sold an item that is no longer in the game for sale you would make a new version without that item. Players who already bought the item can keep it, but new players won’t be able to purchase that item. So far I have set this all up by hand, but that approach scales poorly past a few items. You can download/upload JSON to populate your stores and that is the best way to do this. It’s also very easy to make a store, and then copy it to another title (say you have one title for testing and one title for production) – you can make your mistakes in testing and then when you are happy, download and reupload the JSON into the production economy.
Conclusion
Wow. That was a lot. And just think, that is the “gentle” intro. In this post we covered quite a bit of ground. We went over currencies, catalogs, items, bundles, containers, drop tables, and stores. This is a very powerful system to manage your in game economy as I hope you can see.
One creative way you might use this system would be for NPC specific stores like WoW has, where a specific NPC sells items that are a subset of the catalog. It’s not like every item needs a premium currency, that is just an option. Maybe you have a secret vendor you can only access between X-Y times in a special location – this would be a great way to manage that. Also, since you adjust everything in PlayFab, you don’t need to muck with your game data as often and clients can be updated in real time with new catalogs without needing to restart or download a patch.
I hope you enjoyed this overview of the PlayFab Economy settings. There are a few minor things I might have missed, but I imagine you will figure them out on your own once you know how it all works in general. See you next post!